
Communications encompass a variety of communications. The system accepts the following load file formats: CSV, Pipe, Tab or DAT delimited files.
Depending on how the data was collected or produced, you may not have a UFDR where you could use ESI Desktop to load the collection directly. CloudNine Analyst has an import process that simply requires a load file for the metadata and the use of ESI Sync for the attachments. (Please see ESI Sync for further instructions)
Note: All attachments NEED to be loaded FIRST before importing the metadata
Getting Started
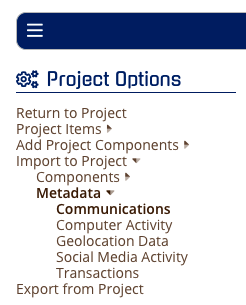
After you have created and loaded data to your Evidence Container using ESI Sync, you can begin loading the metadata, go to Project Options > Import to Project > Metadata > Communications
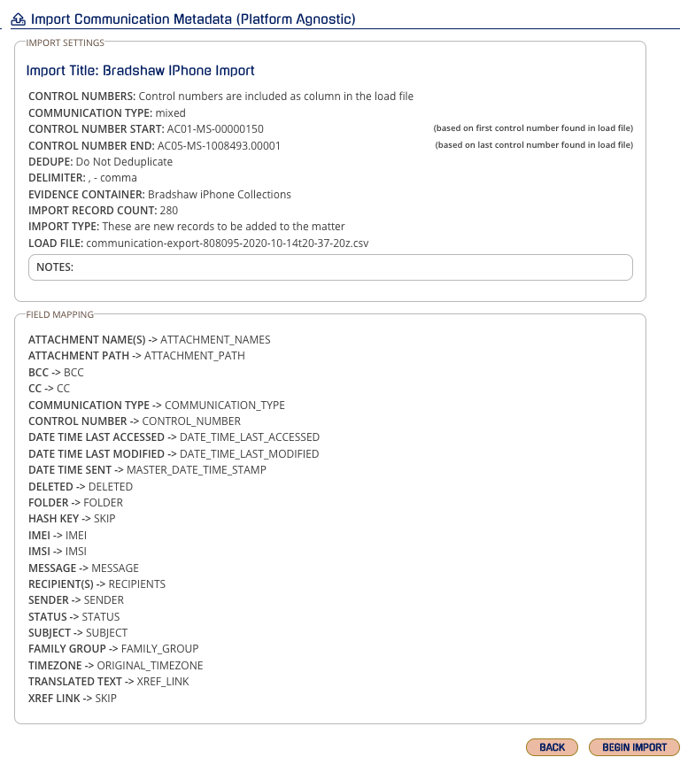
Once in Communications, add your Import Name, and on the left-hand side are instructions that will help you navigate your import. Below are also the descriptions of each of the options on import.
Import Options
- Import Type: If these are new records you are adding, keep the first option. If updating records, you will need to provide the original Control Number as one of your columns, otherwise, records cannot be updated. If a control number is provided that is not in the system, the record will be skipped. More Detailed Information Here
- Control Numbering: If you are wanting to create your own Control Numbers, when clicking next at the bottom of the page you will be able to designate a control numbering prefix, padding, and starting number if control numbering is not designated within the load file itself. If you have a numeric ID field, you can use this as the numeric value of the control number, which will be zero-padded at the designated length combined with any prefix provided. Note that if an ID field is designated, it must be unique to each record, otherwise records with identical numbers will be skipped. More Detailed Information Here
- Communication Type: Select the type of communication you are loading with the associated load file. If you are select "mixed" you MUST have a column in your load file that specifies the communication type, which can be either email, chat, sms, or mms. More Detailed Information Here
- Isolate Threads: Isolation of chat threads allows for the comparison of chat threads present on different devices. This keeps the chat thread from being combined with other evidence and shows it as it appeared on that single device. Otherwise, chats, sms, mms and text-based messages are combined from each device / import to form a single thread. If you choose to isolate threads, you will not have the option to globally deduplicate. More Detailed Information Here
- Deduplication: The options for deduplication give you flexibility in how you are managing duplicates in the system. Generally used is the "GLOBALLY DEDUPLICATE ITEMS BASED UPON SYSTEM HASH" is recommended if you do not want to see duplicates when loading multiple devices across multiple custodians. Global deduplication of chat, text, sms, mms, and other text-based media may not result in full deduplication of items. This is due to the nuances of content storage settings of mobile and app-based data. Deduplication may have unexpected affect on messages and threads. Local deduplication looks for messages with the exact same content sent at the exact same time by the same users. This often occurs with various backup programs used on mobile devices. More Detailed Information Here
- Evidence Container: In order to continue an import, you will need an evidence item to which this import is associated. Without it, you will not be able to continue. If there are associated files, you will need to upload them to the evidence using ESI Sync.
- Upload Load File: Either drag and drop your load file or browse to the desired load file.
- Delimiter: You can select comma, pipe, tab or Concordance DAT and note it is assumed that text values will be surrounded by quotes (").
Once you have your desired settings click NEXT and you will be directed to map the proper fields. These fields need to be mapped to the same fields you want to be mapped in CloudNine Analyst. The names can be named whatever you would like, just be careful with your mapping. If you make a mistake, you can always run an overlay.
Once you have the fields properly mapped, click NEXT to verify and begin the import.
It is best practice to double-check your mapping, but you can always use the "OVERLAY" option if you need to replace any fields.
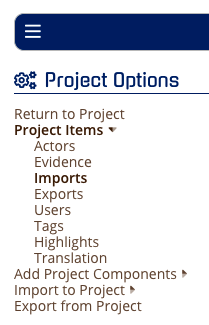
Click Begin Import and you can monitor the process in Project Items > Imports
You can hover over STATUS to see how many items are updated and a "checkered flag" will display when the process is complete.
