
ESI Desktop uses a wizard-based approach for importing data into CloudNine Analyst. The format and process for importing data is similar across all modules and provide a direct conduit from the source data to CloudNine Analyst. To start the import process of a UFDR, click on "Import Phone" in the top menu.
Project and Evidence Container Selections
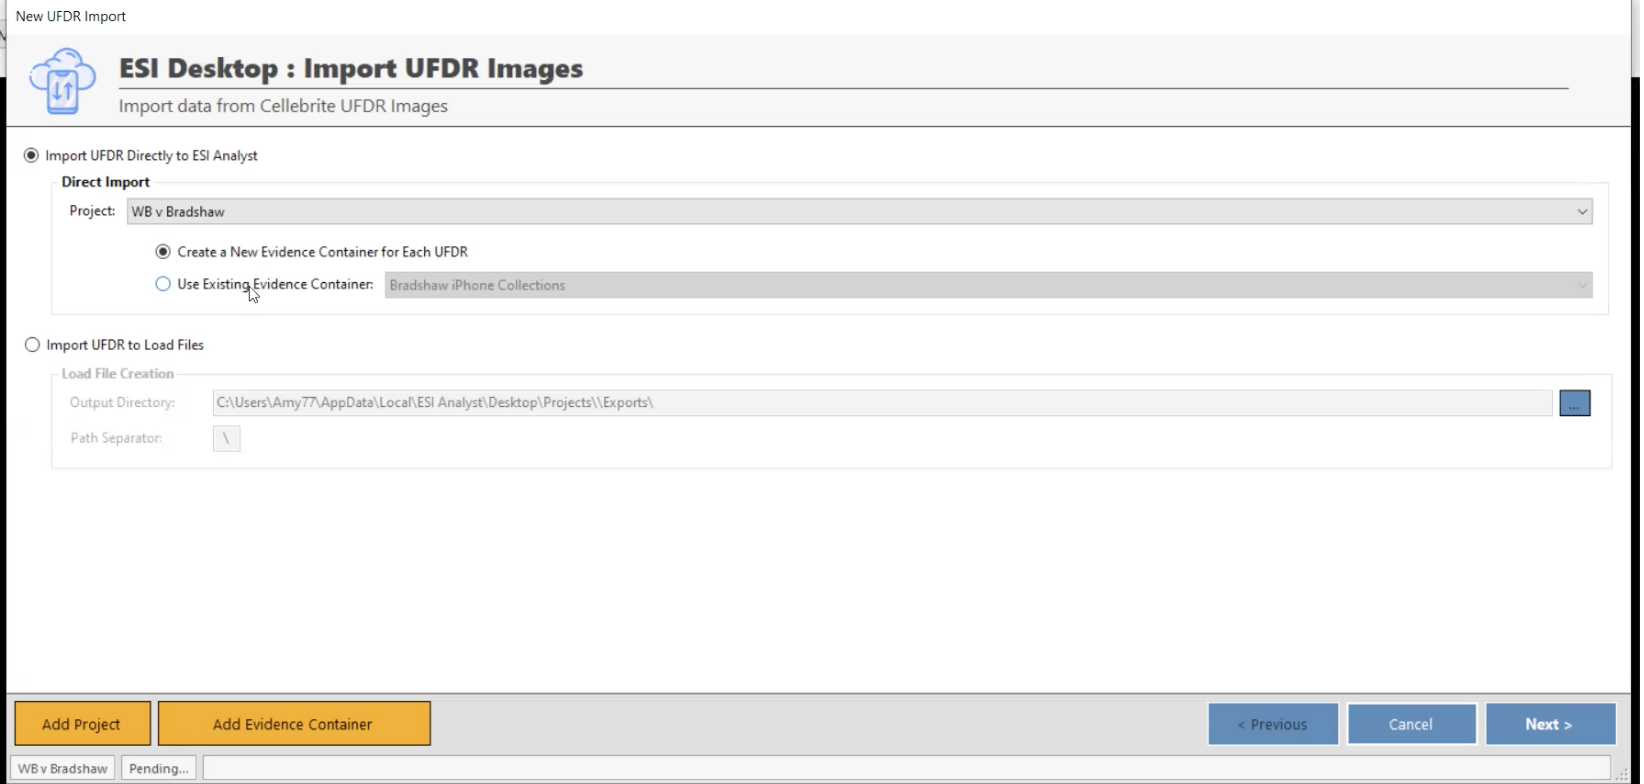
The first step of importing data is to select the project that the data will be loaded into. Data will be loaded for the currently selected Client in the ESI Desktop main window which is also displayed in the import wizard status bar at the bottom left. At this point, you have the option to either select from an existing project or create a new project. All existing projects will appear in the drop-down list and to create a new project simply click on the “Add Project” button. Adding a project is the same process as from the Project Management window. Once added the new project will appear in the drop-down list of available projects.
Once you have selected a project, you can either choose an existing Evidence Container to load data into, create a new Evidence Container, or allow ESI Desktop to create evidence containers dynamically based on the data being loaded. Generally speaking, allowing ESI Desktop to dynamically create containers will be your best and easiest option, but the other options are available if needed. After selecting your project and evidence container, click "Next."