Project Invitations
Below are the steps to send a project invitation to a new user or an existing user.
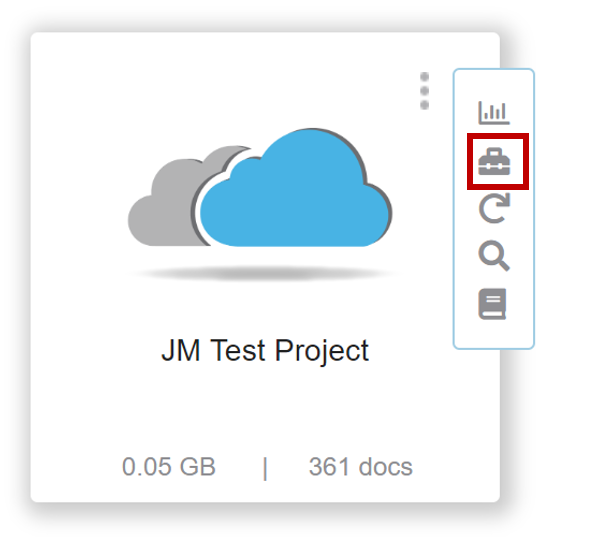
Begin by selecting the "project maintenance" briefcase button demonstrated in Figure 1 below.

Figure 1

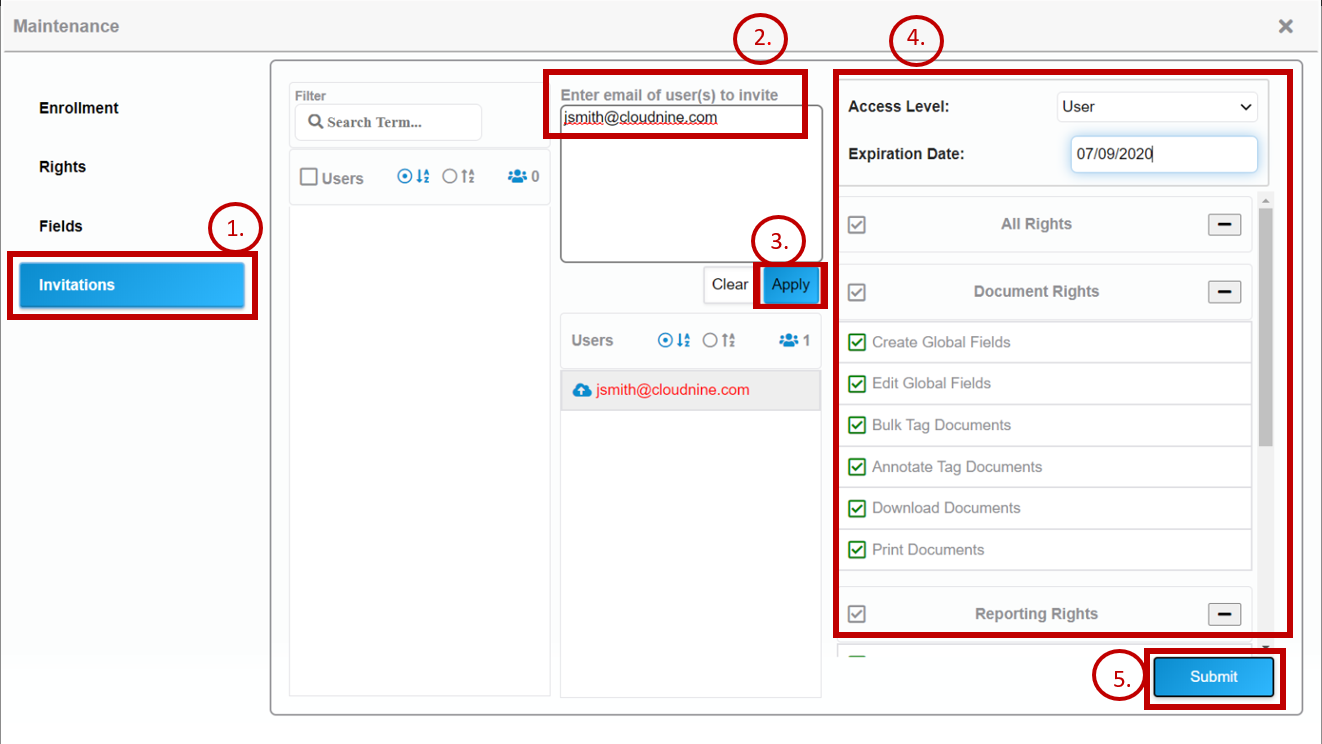
Figure 2.
Here in project maintenance, we can send project invitations to the desired users. Below are the steps to send project invitations. User Figure 2 above for reference.
1.) Click on the "Invitations" tab to enter the project invitation panel.
2.) Enter the email addresses of the users you would like to send a project invitation to. To add multiple users insert their email addresses separated by a semicolon.
3.) Click "apply" to add them to your list.
4.) Under "Access Level" set the desired rights for the users by checking the boxes next to each right.
5.) Click "Submit" and your project invitations will be sent.
