What is Required to Create a CloudNine Analyst Account?
All that is necessary to create an account within CloudNine Analyst is the person's name and the email address they wish to use to gain access to the interface.
Depending on the level of permissions you would like a user to have, ensure you are on the proper page and confirm their account level before adding them to your instance.
Granting the incorrect level of access to a user account may expose the user to matters to which they should not have access. It is up to the administrator to ensure the proper account level is assigned during account creation. If the account was created in error, you can remove the user's account immediately and contact support for assistance to ensure permissions are reset for the account.
Creating a Partner Admin
A Partner Admin account has full access to all Clients, their projects, and administrative settings, as well as the ability to add additional users and administrators for Clients. It is important to only grant Partner Admin access to those that are trusted within your organization.
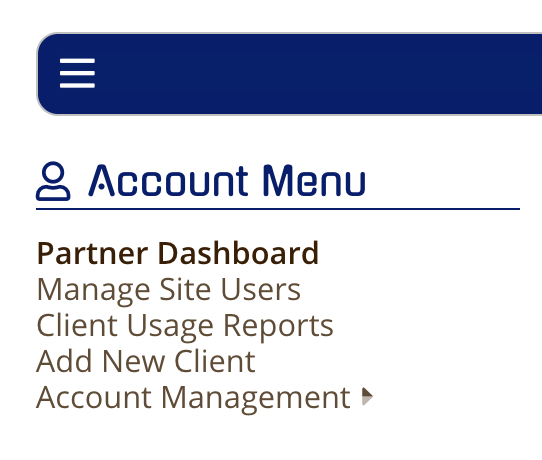
Only Partner Admins can add additional Partner Admins. To add an additional Partner Admin navigate to Manage Site Users in the fly-out menu.

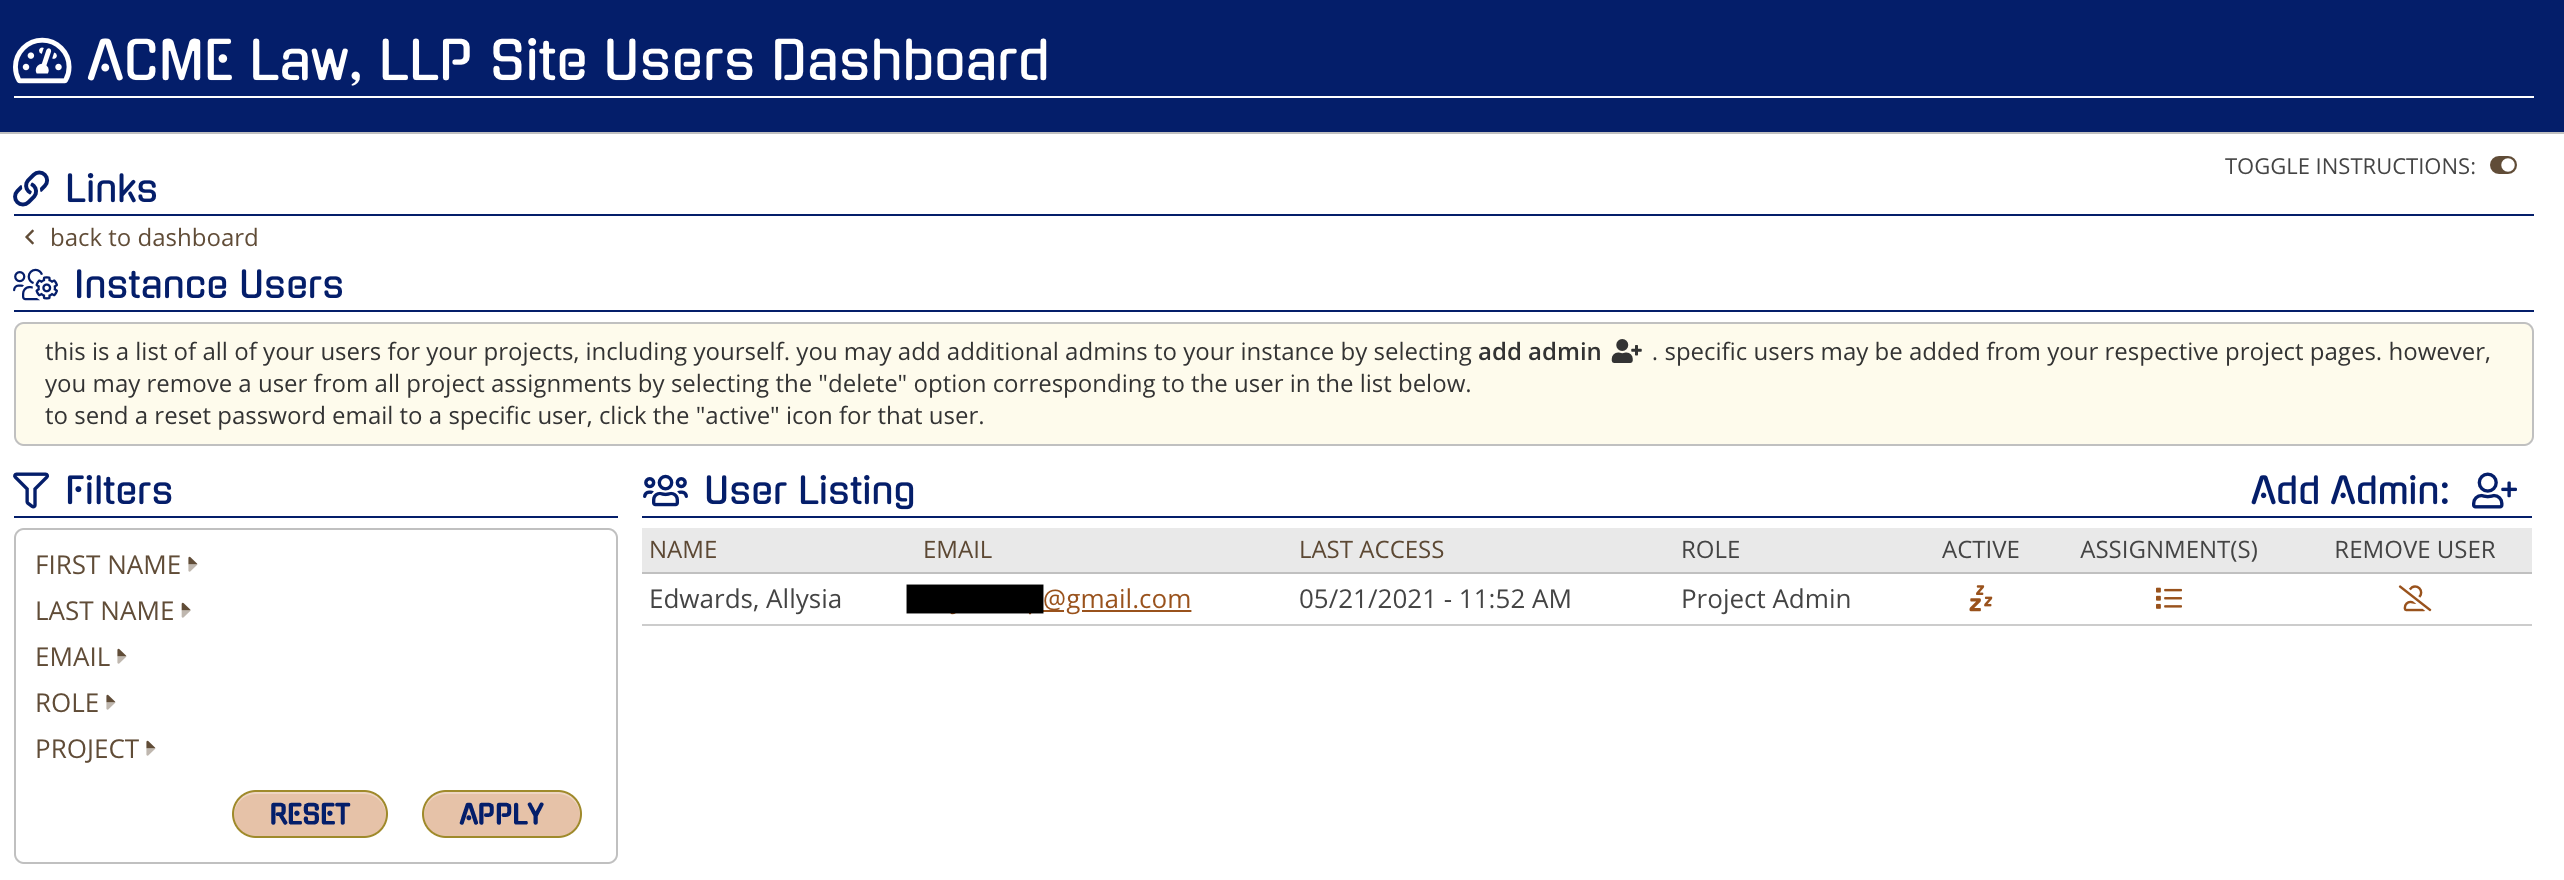
Once in this dashboard, you will see a list of all of your instance's user accounts.
On the upper right side of this dashboard, you will see "Add Partner Admin". Click this link to open up the Add User dialogue window.
By default, the Partner Admin role is selected (and the only available option).
Enter in the individual's First Name, Last Name, and Email (you will need to confirm the email address as well).
Once this information is entered, click "Add User". You will receive a prompt that the User account has been created. If there is already an account with the email provided, the account will undergo one of the following operations:
- Be reactivated (if the account had been previously removed)
- Be upgraded (if the account had been initially created as another user account level)
- Permission will be granted to this account to view all current Clients, Projects, and management of the same.
Removing a Partner Admin
You cannot remove your own account. Only another Partner Admin can remove your account. If you need assistance managing accounts, please contact support.
To remove a Partner Admin, navigate to the same dashboard as above ( Creating a Partner Admin), there is a link below the column header "Remove User." Click this link

This will open the following prompt:

Clicking "Remove User" will finalize the process, deactivate the account, and remove all permissions for this user.
Creating a Client Admin
To create a Client Admin navigate to your Partner Dashboard, accessible from the right-hand fly-out menu or the upper header menu.

Once in your dashboard, you will see a list of Active Clients. To the right of each Client Name, you will see an icon in the column "Add Admin". Click the icon that corresponds to the desired Client.
icon:

dashboard:
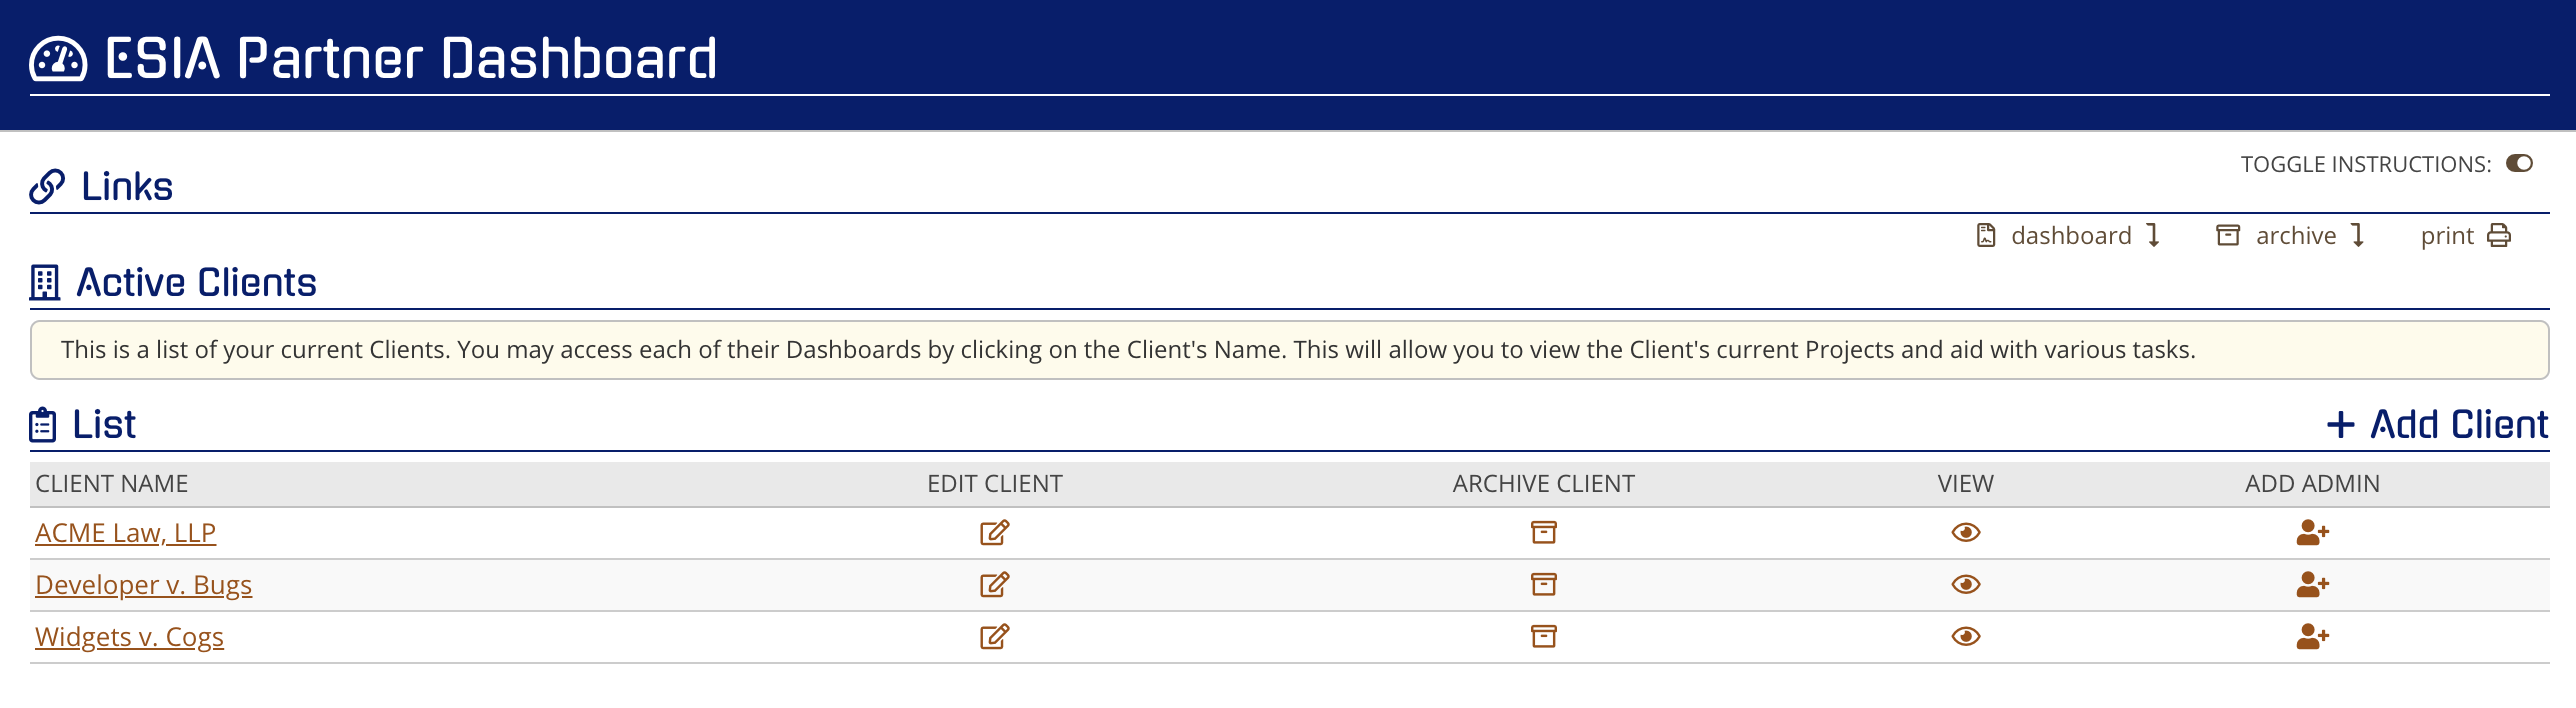
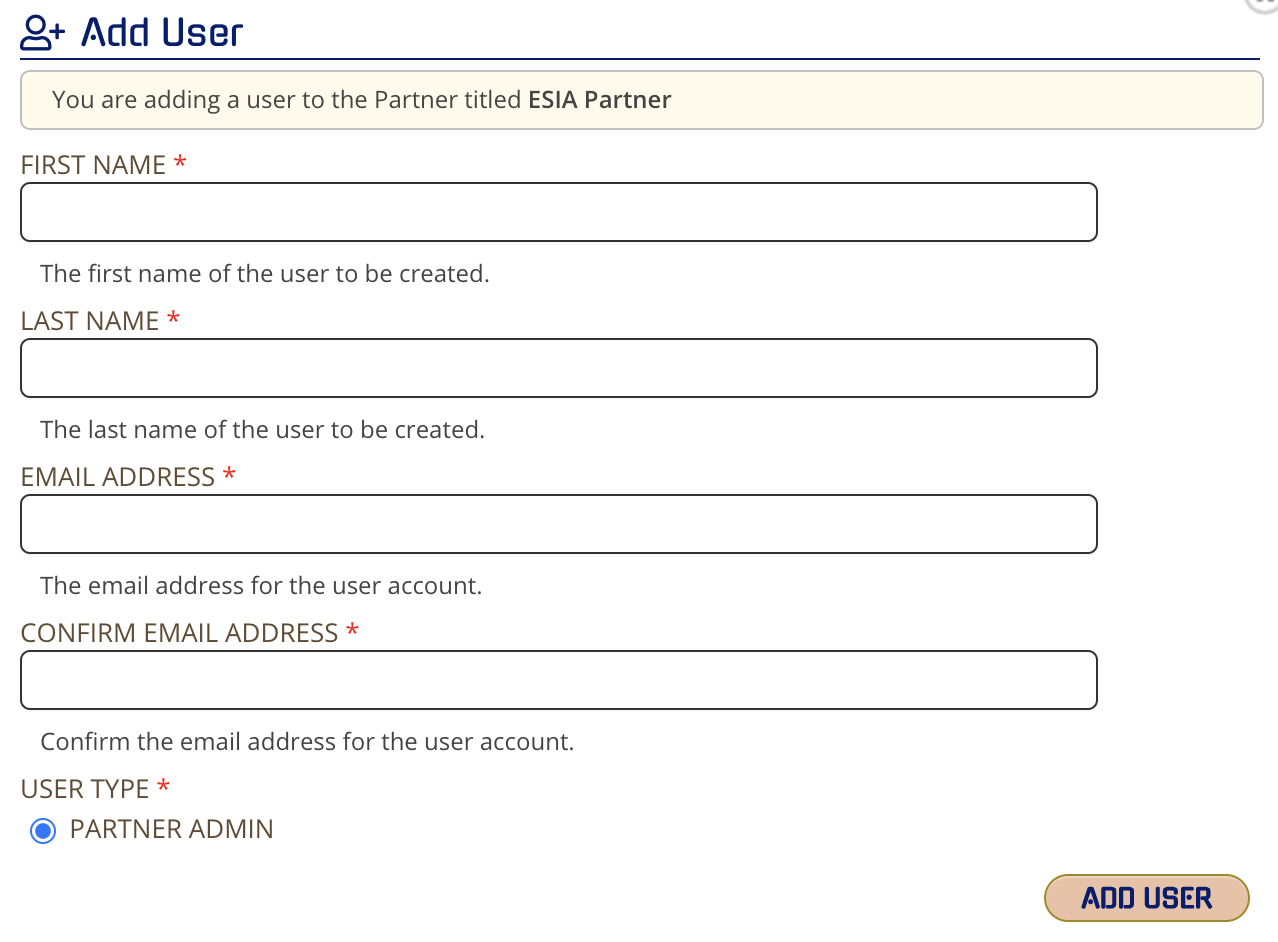
Clicking this icon will launch the Add User window.
Enter in the individual's First Name, Last Name, and Email (you will need to confirm the email address as well).
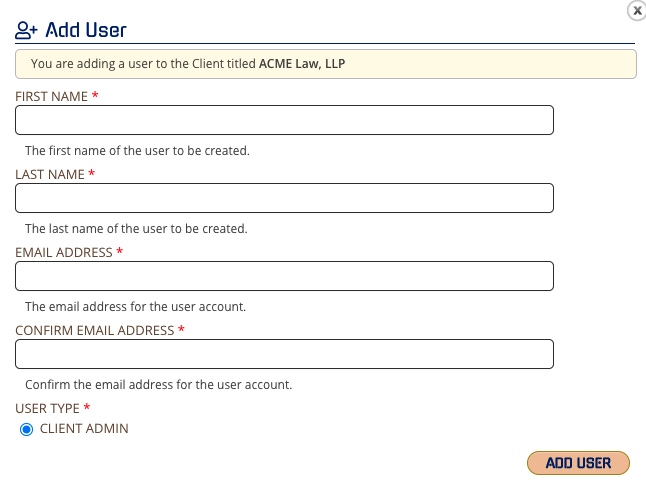
Once this information is entered, click "Add User". You will receive a prompt that the User account has been created. If there is already an account with the email provided, the account will undergo one of the following operations:
- Be reactivated (if the account had been previously removed)
- Be upgraded (if the account had been initially created as a Project User or Project Admin)
Removing a Client Admin
To remove a Client Admin, navigate to your Manage Site Users dashboard.
There is a link below the column header "Remove User". Click the link that corresponds to the user you wish to remove.

After clicking this link you will be prompted to confirm the removal of the account.
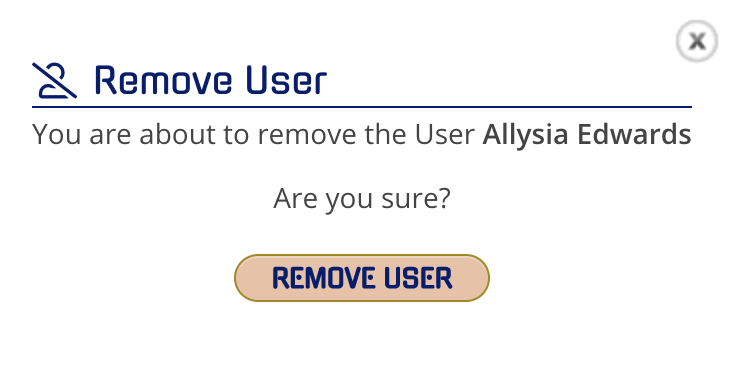
Clicking "Remove User" will finalize the process, deactivate the account, and remove all permissions for this user.
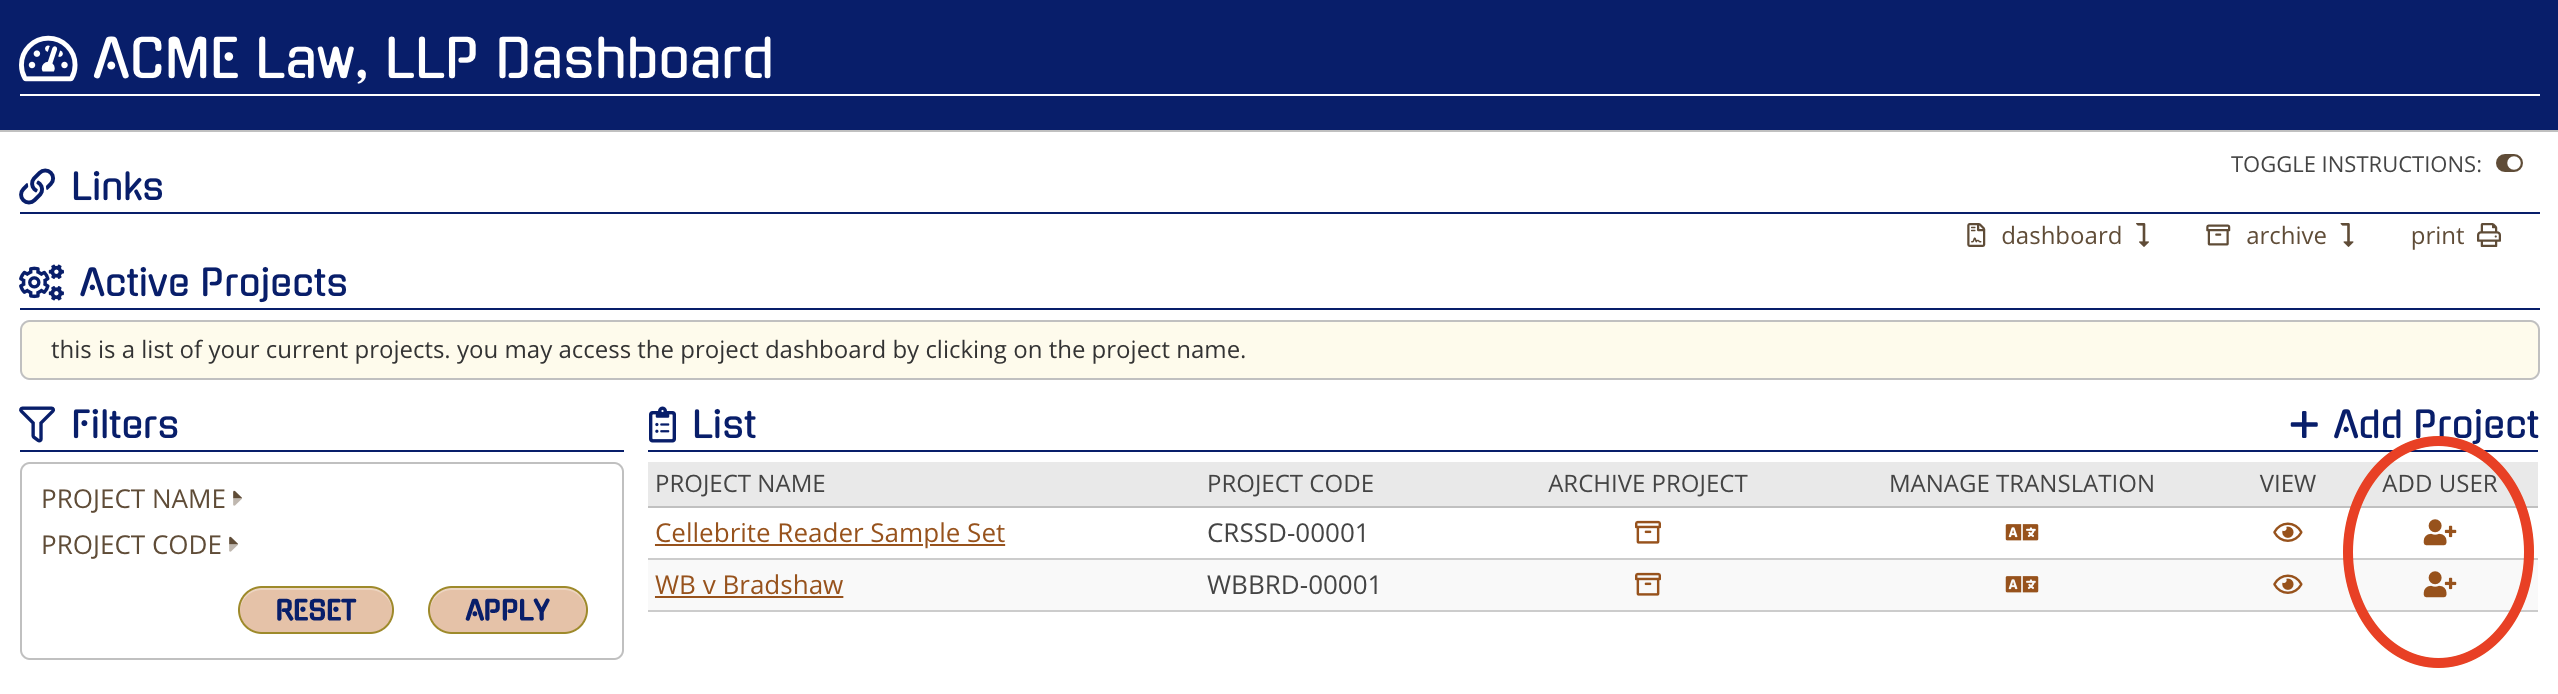
Creating a Project Admin or Project User
When in a Client's Project Dashboard, you can select “Add User ” for any of the listed Projects. Select the Add User icon that correlates to the Project to which you want to add the User.
This will open the Add User dialogue window.
Enter in the individual's First Name, Last Name, and Email (you will need to confirm the email address as well).
By default, "Project User" is selected. If you wish this account to be a Project Admin, you will need to change this selection.
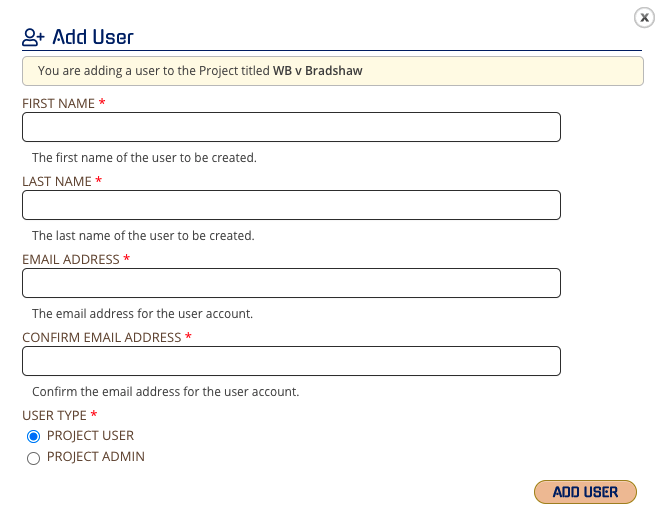
Once this information is entered, click "Add User". You will receive a prompt that the User account has been created. If there is already an account with the email provided, the account will undergo one of the following operations:
- Be reactivated (if the account had been previously removed)
- Be upgraded (if the account had been initially created as a Project User)
Removing a Project User or Project Admin
To remove either type of account, navigate to your Manage Site Users dashboard.
There is a link below the column header "Remove User". Click the link that corresponds to the user you wish to remove.

After clicking this link you will be prompted to confirm the removal of the account.

Clicking "Remove User" will finalize the process, deactivate the account, and remove all permissions for this user.
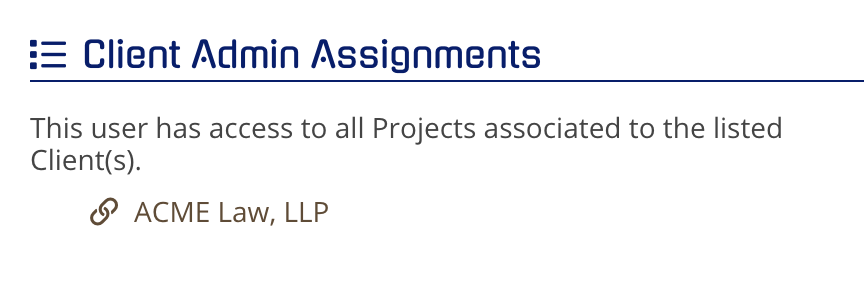
Understanding an Account's Assignments
If you are a site administrator and want to ensure you have applied the correct assignments, you can always go to "Manage Site Users" under Account Menu to see those assignments.
Navigate to Manage Site Users

Once in the dashboard, you will see a column titled "Assignments". Click on the list icon below that correlates to the account you wish to validate.
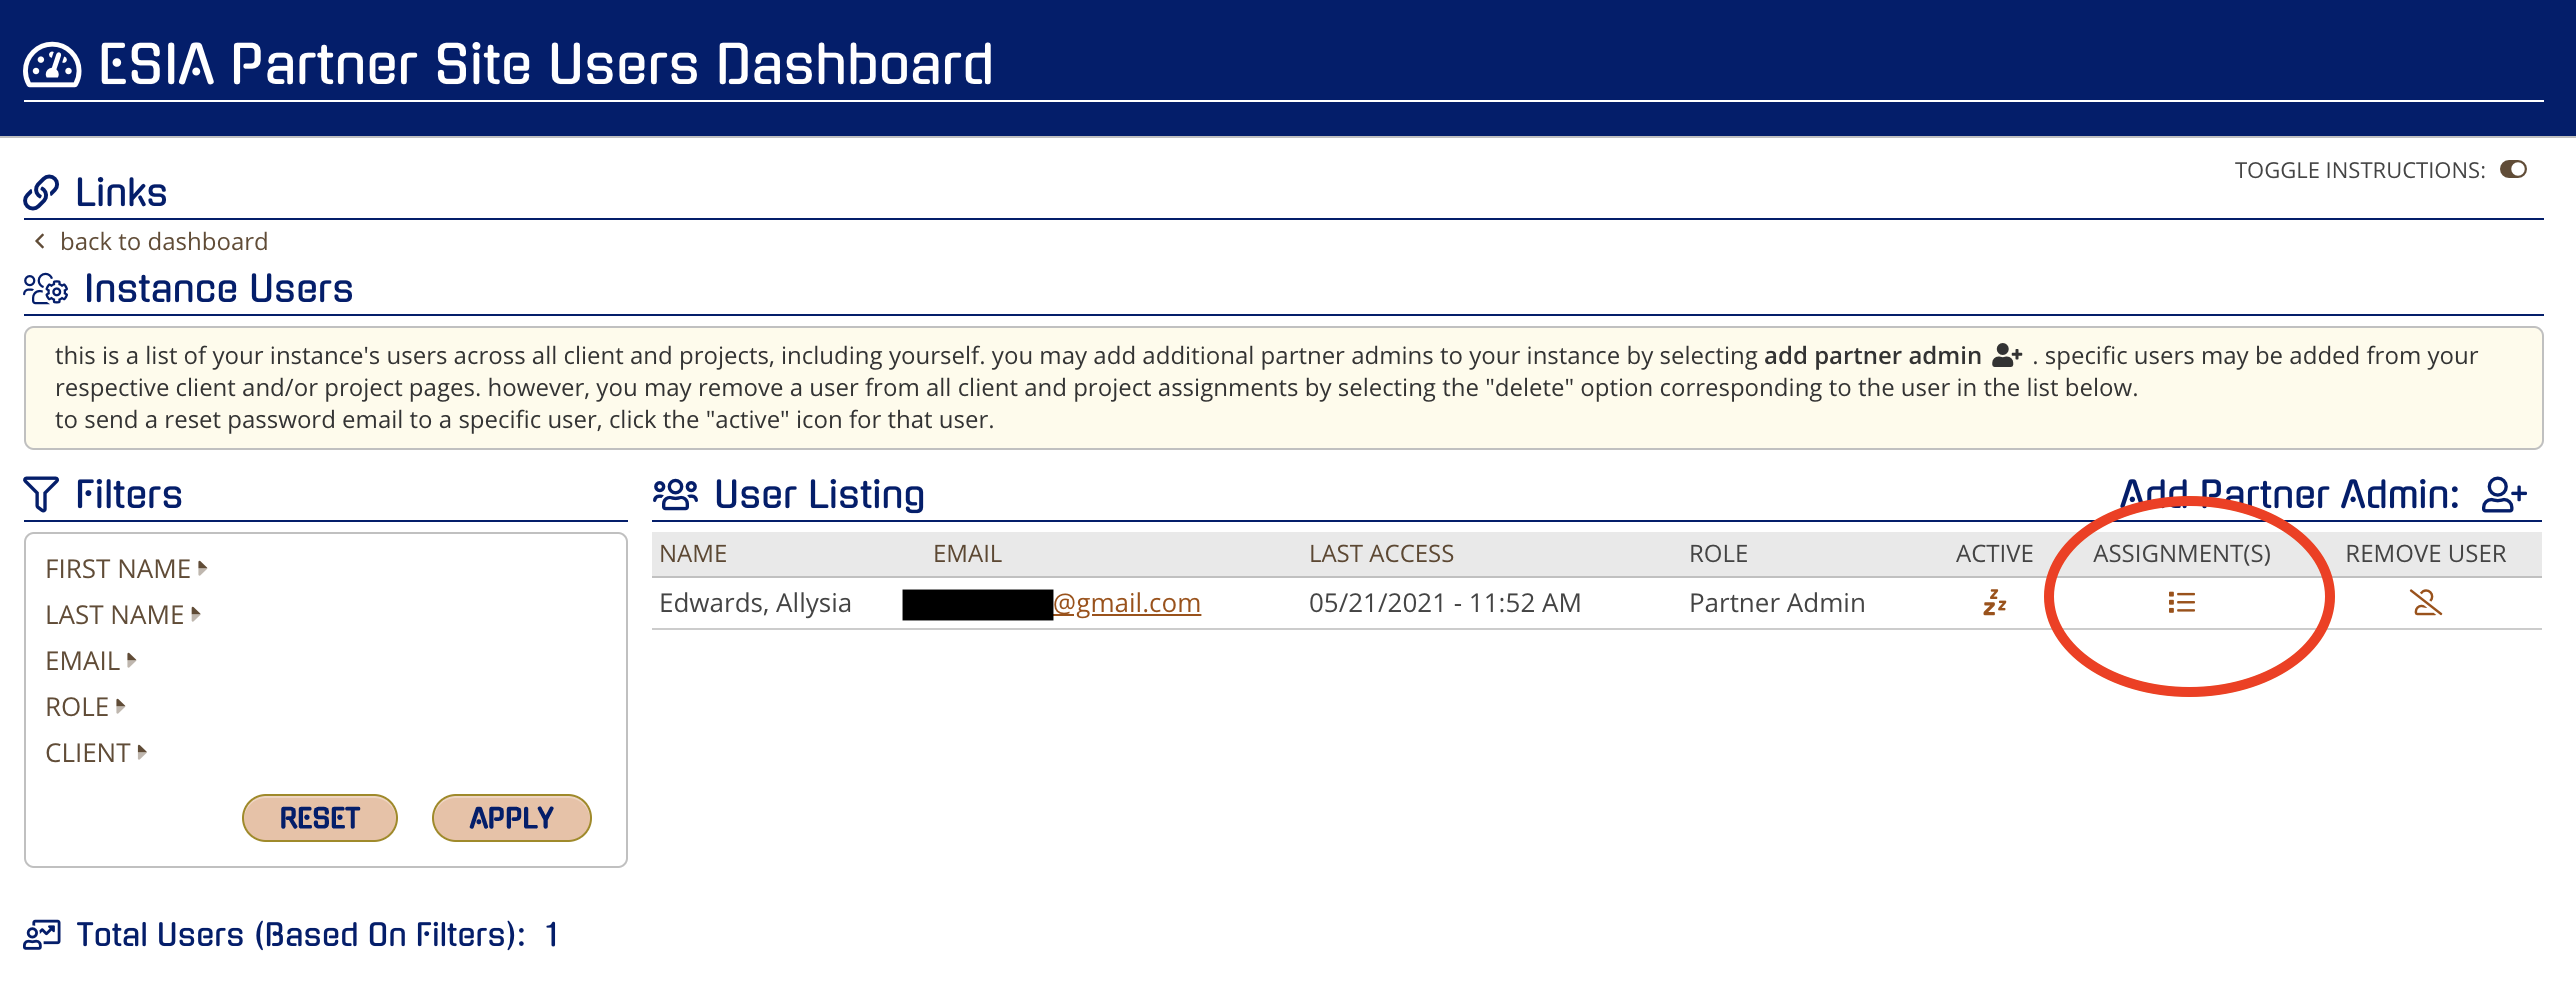
Clicking this window will open their Assignments window. The assignments list may vary depending on their assigned account level.