
Timelines in CloudNine Analyst are used to aggregate important items found during review and display them in chronological order. All of these important items can be filtered to specific days, actors, tags, and other criteria to quickly create the timeline. There are two types of Timelines:
- Timeline of Events
- “On this Day” Timeline
All timelines can be saved for later using the Saved Search feature for future use or share with the team.
Timeline of Events
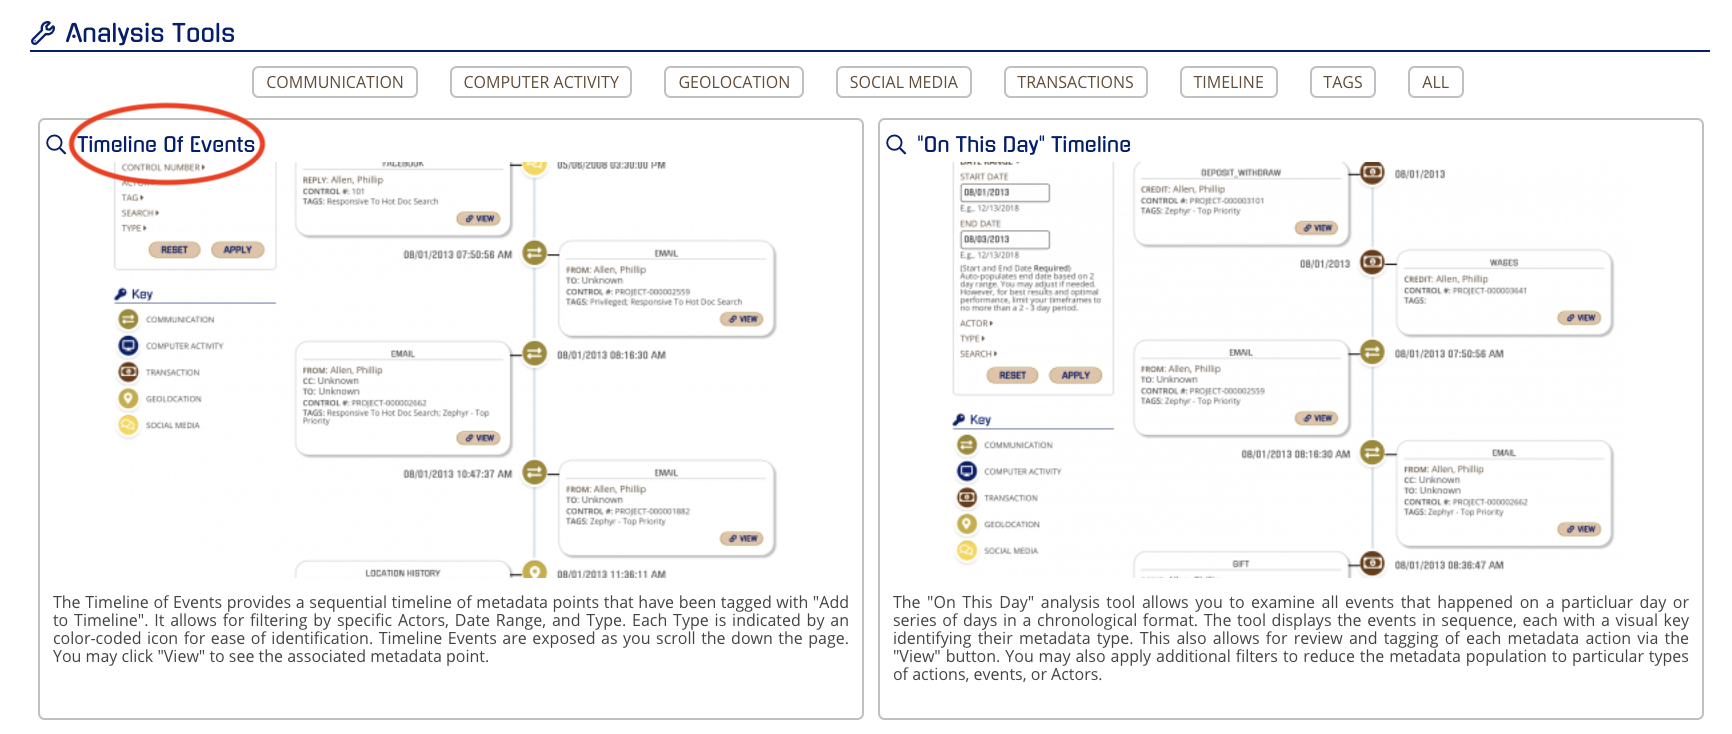
Timeline of Events provides a sequential timeline of metadata points that have been tagged with "Add to Timeline." This Timeline can be found in Analysis Tools or Timeline of Events in the project dashboard.
From Analysis Tools:

From Timeline of Events:
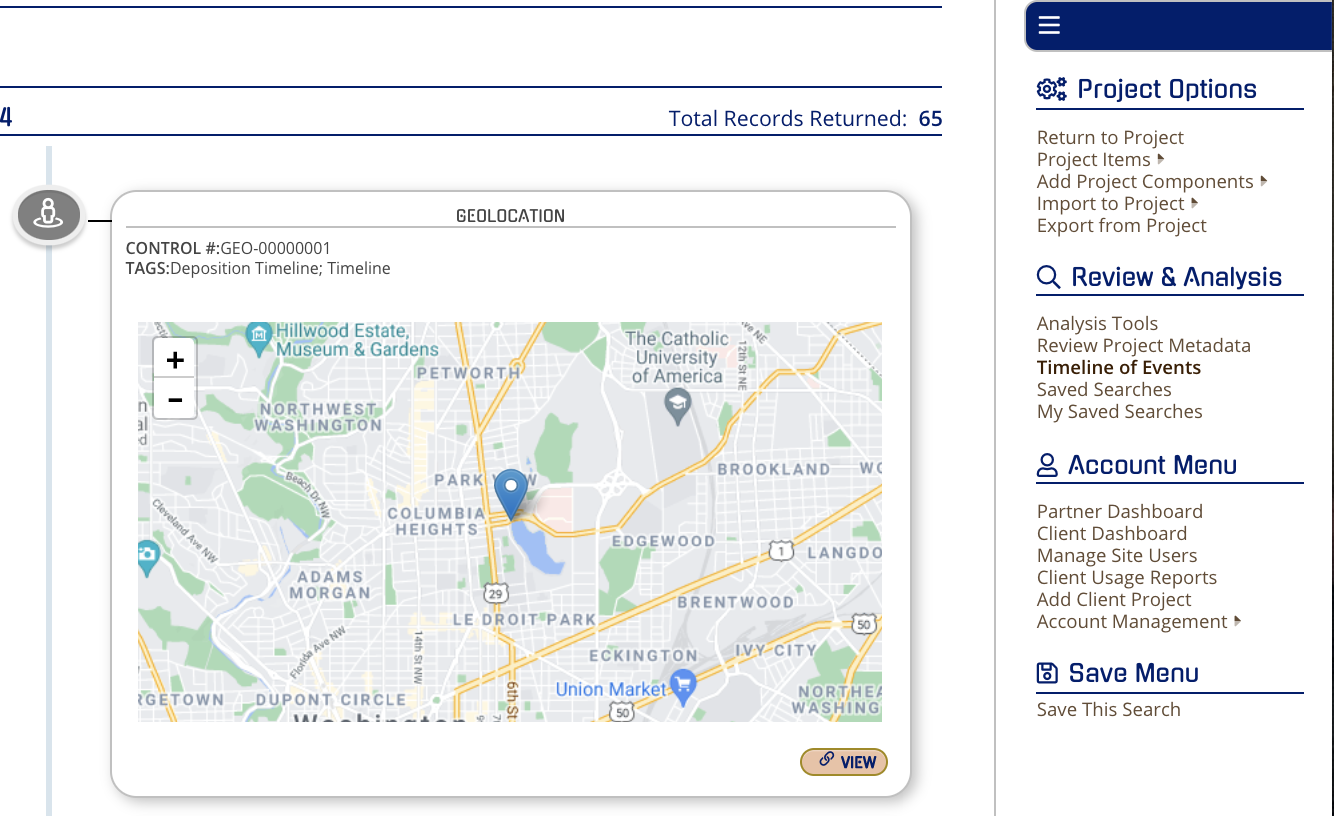
The Timeline of Events allows for filtering by specific Actors, Date Range, and Type. Each Type is indicated by a color-coded icon for ease of identification. Timeline Events are exposed as you scroll down the page. You may click "View" to see the associated metadata point.
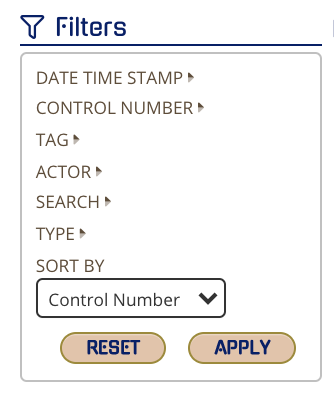
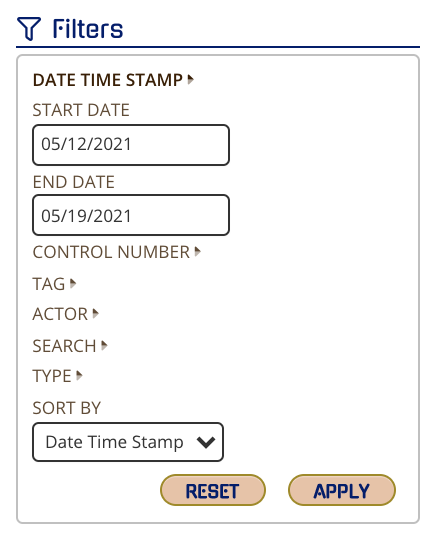
The timeline that is automatically created will be a chronological order of all items tagged but can be filtered by:
- Date Time Stamp
- Control Number
- Tag
- Actor
- Search (Boolean)
-
Type
-
Sort By
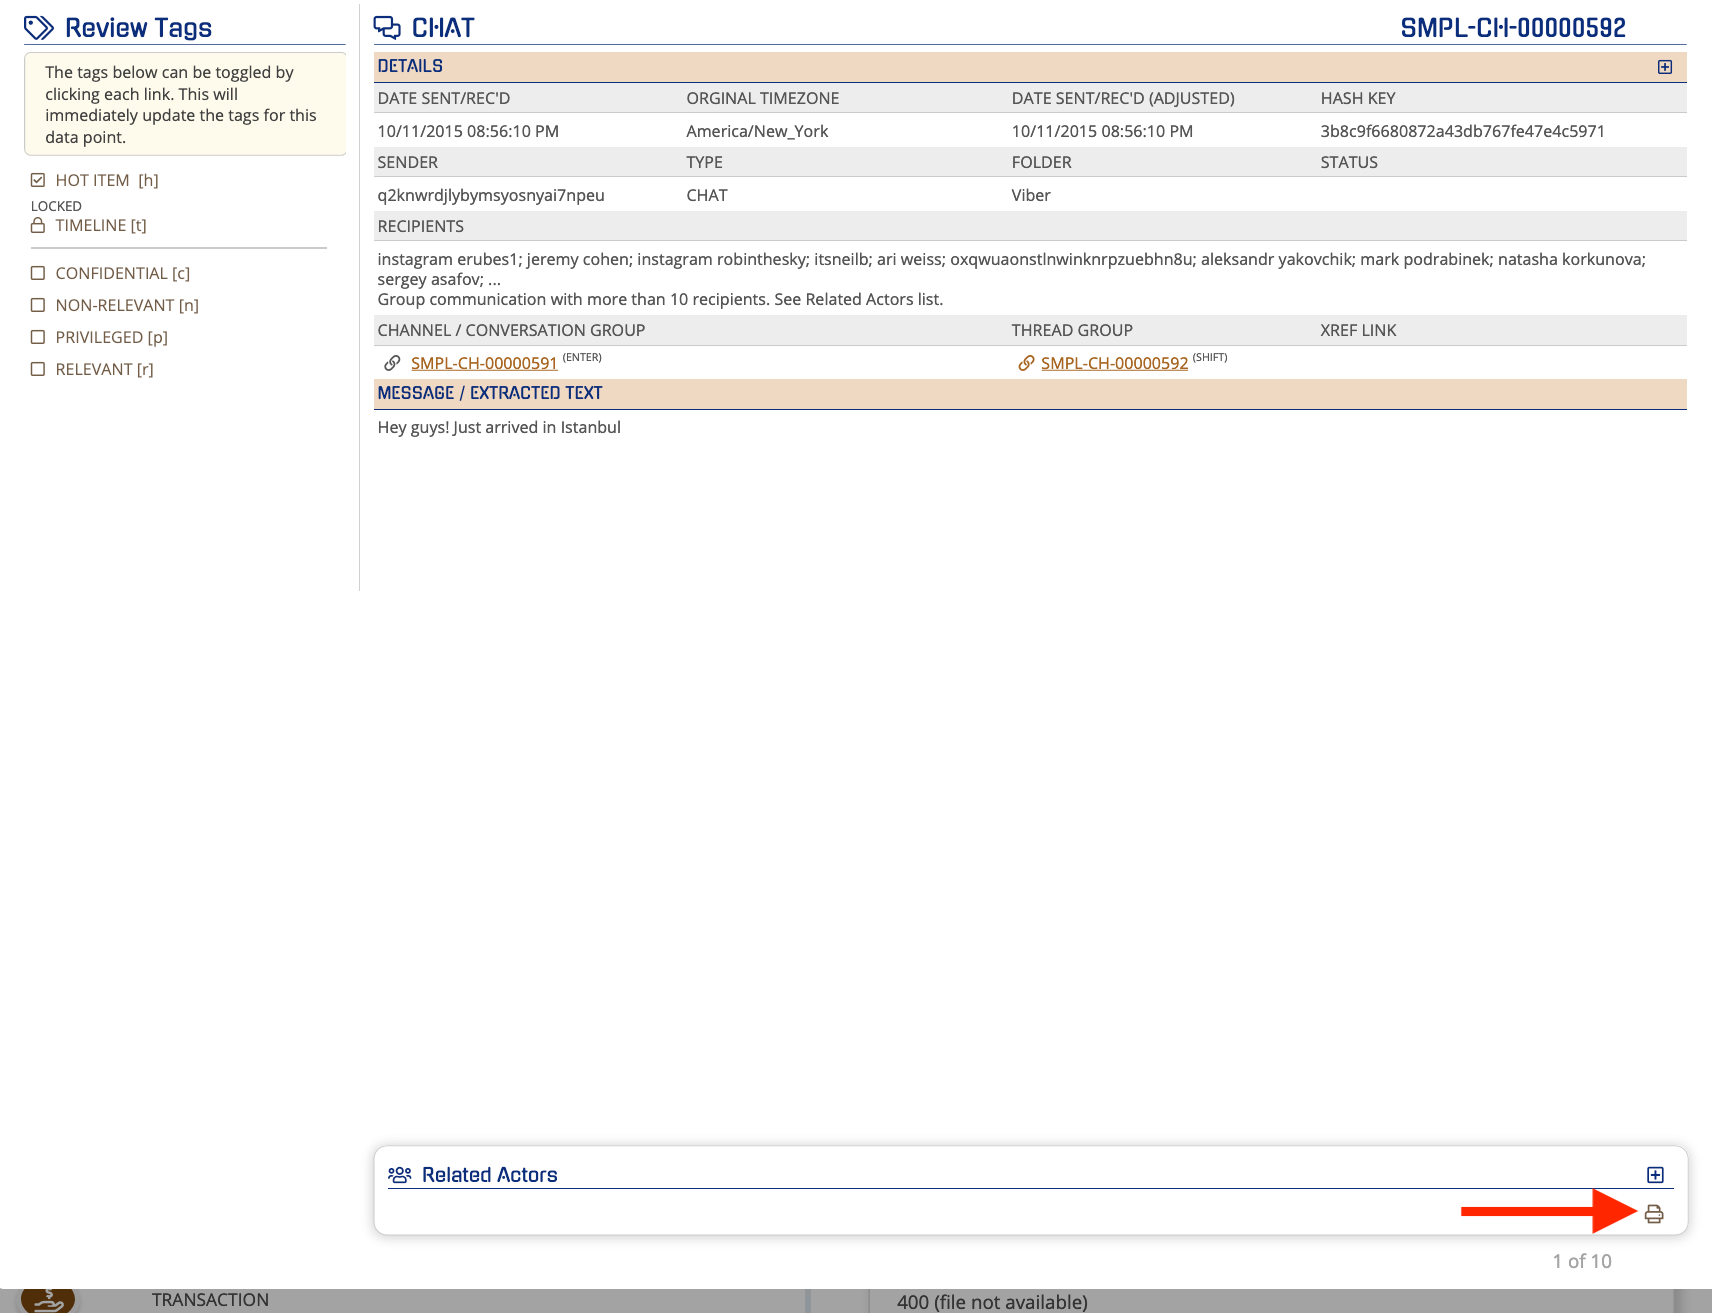
When you click "View" on one of the events, you can save it as a PDF or print it by clicking on the icon at the bottom right.
These timelines can be created and saved using the Save Search feature at the bottom of the project dashboard.

“On This Day” Timeline
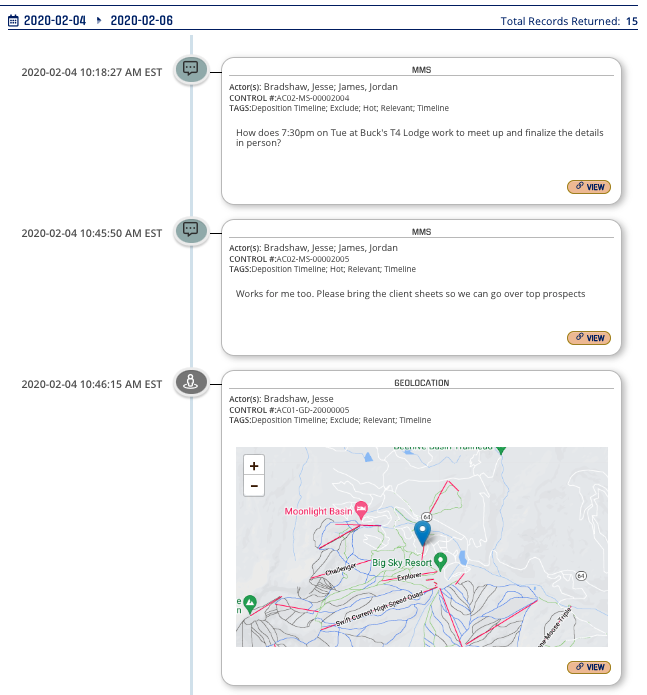
The "On This Day" Timeline in Analysis Tools allows you to examine all events that happened on a particular day or series of days in a chronological format. The tool displays the events in sequence, each with a visual key identifying their metadata type. This also allows for review and tagging of each metadata action via the "View" button.
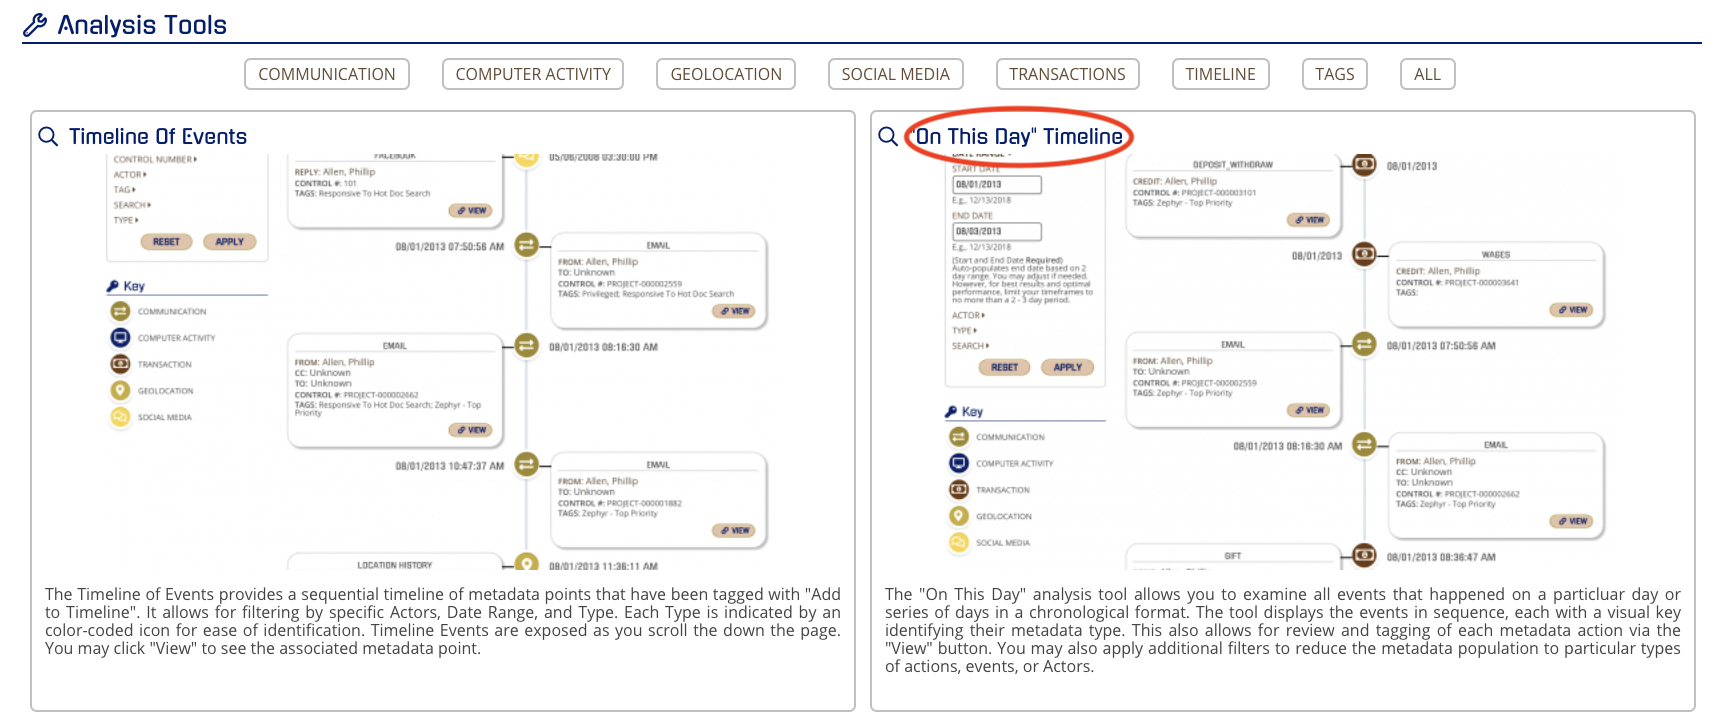
You may also apply additional filters to reduce the metadata population to particular types of actions, events, or Actors.
To begin, you must start with the first day you would like to start the timeline. The filter functions are the same as the Timeline of Events and all timelines can be saved using the “Save This Search" Function.
By default, the "On This Day" Timeline will set a 7-day time frame. However, there is no date limit on the timeline
Pro Tip: Do your analysis in "Review Project Metadata" and only leverage "On This Day" Timeline to create the visual timeline needed.