
In order to upload files to an evidence container, you must first configure your evidence container and assign it a local folder of files upon your computers hard drive.
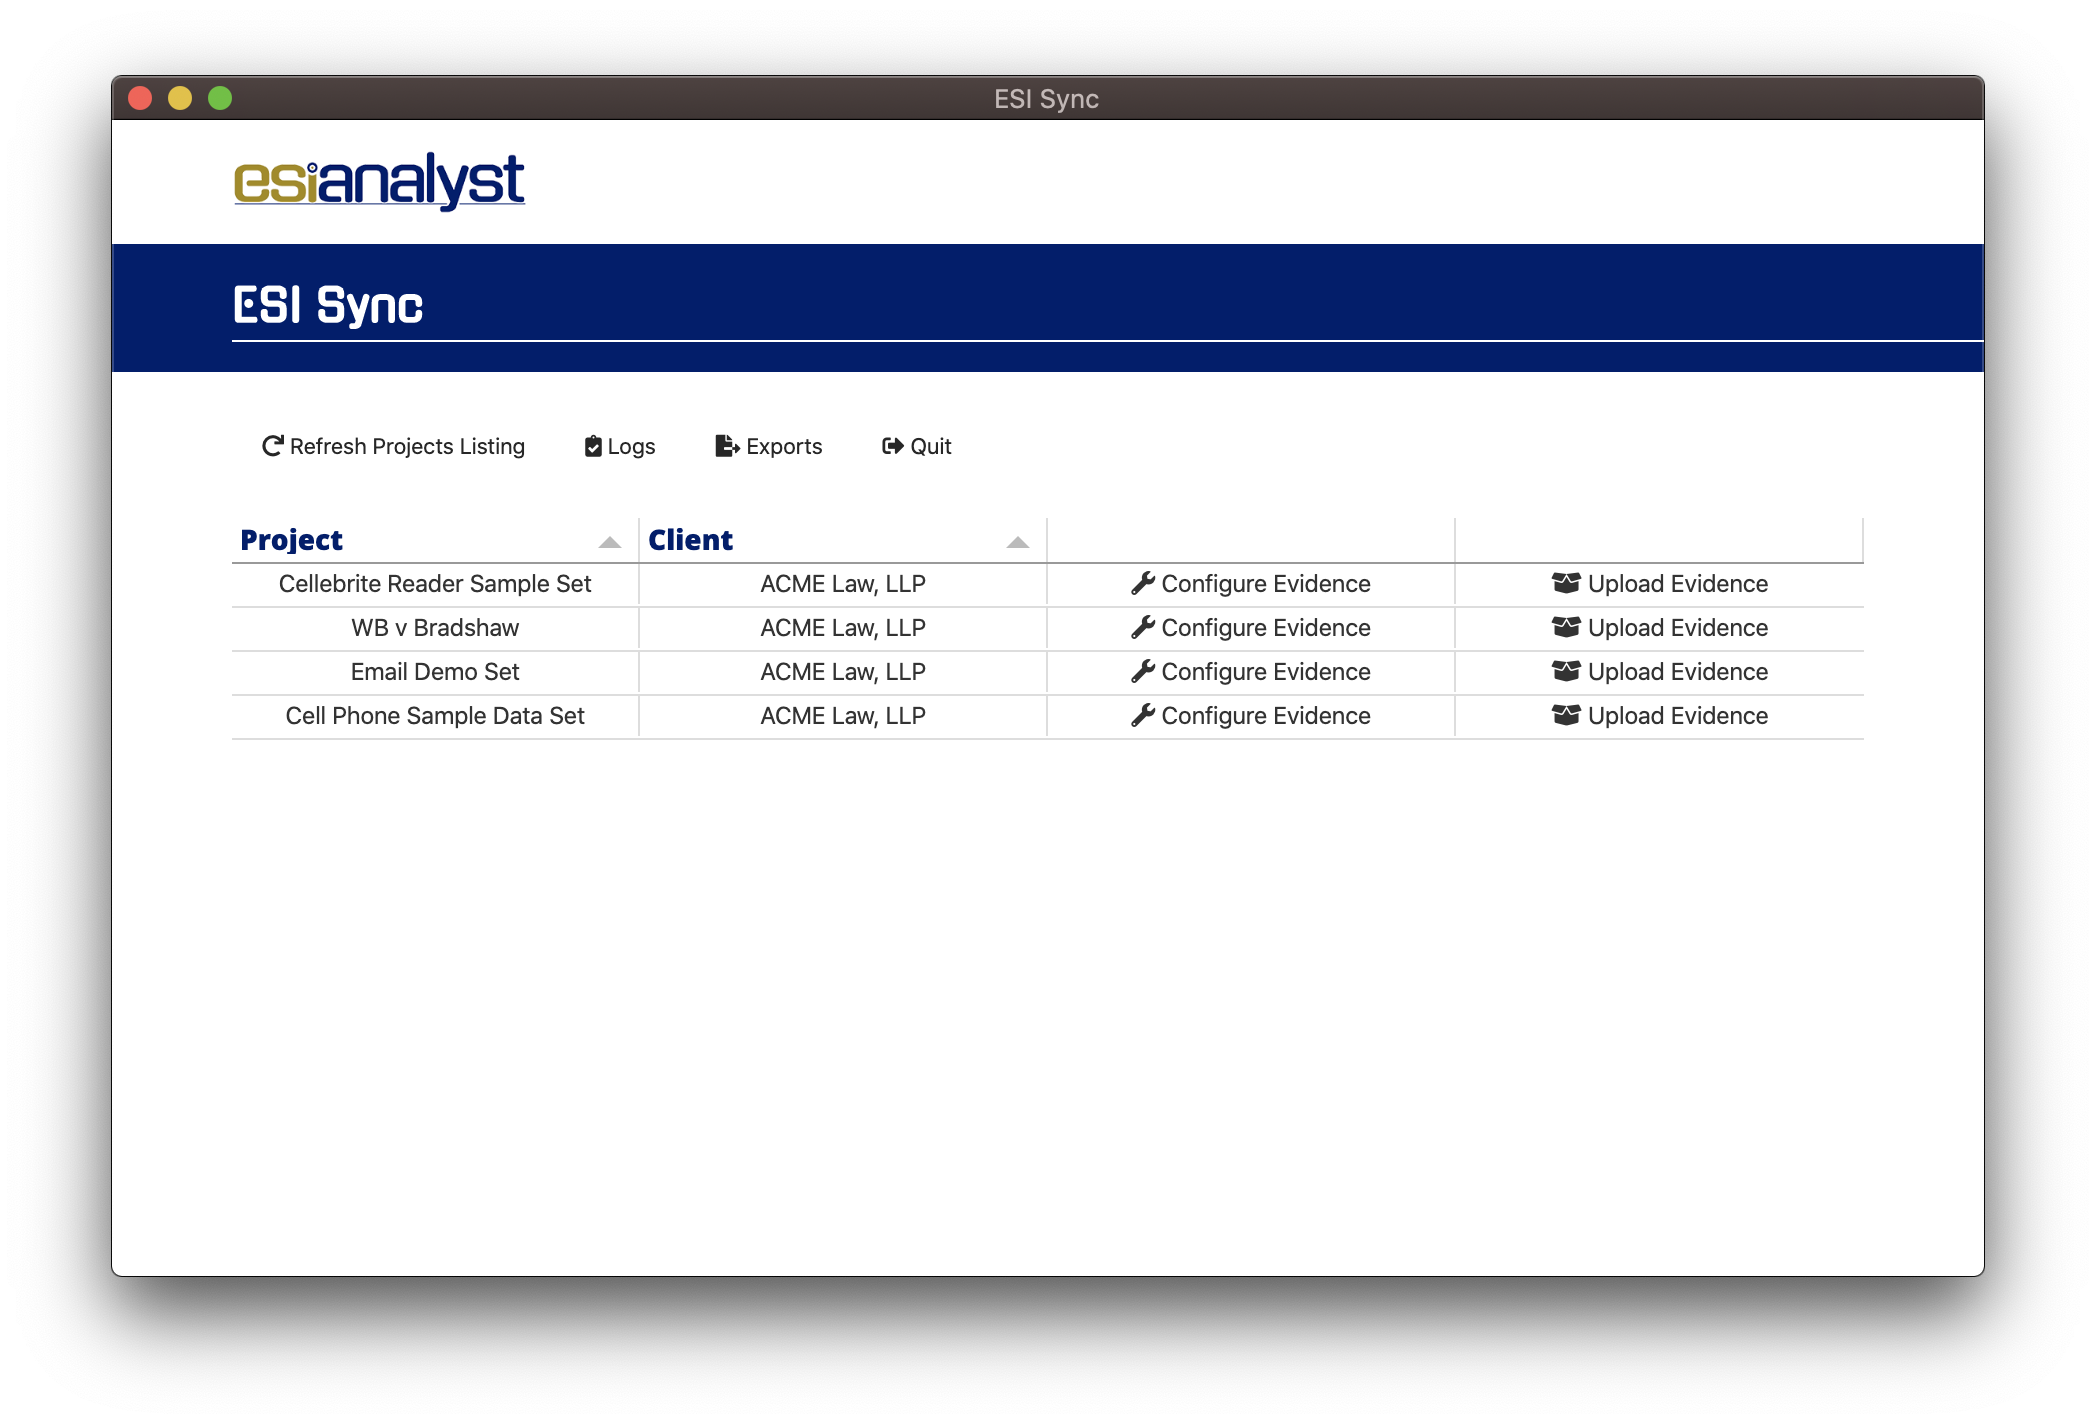
Click the Configure button next to the project you wish to upload files to.
You should now see the projects evidence containers as displayed below:
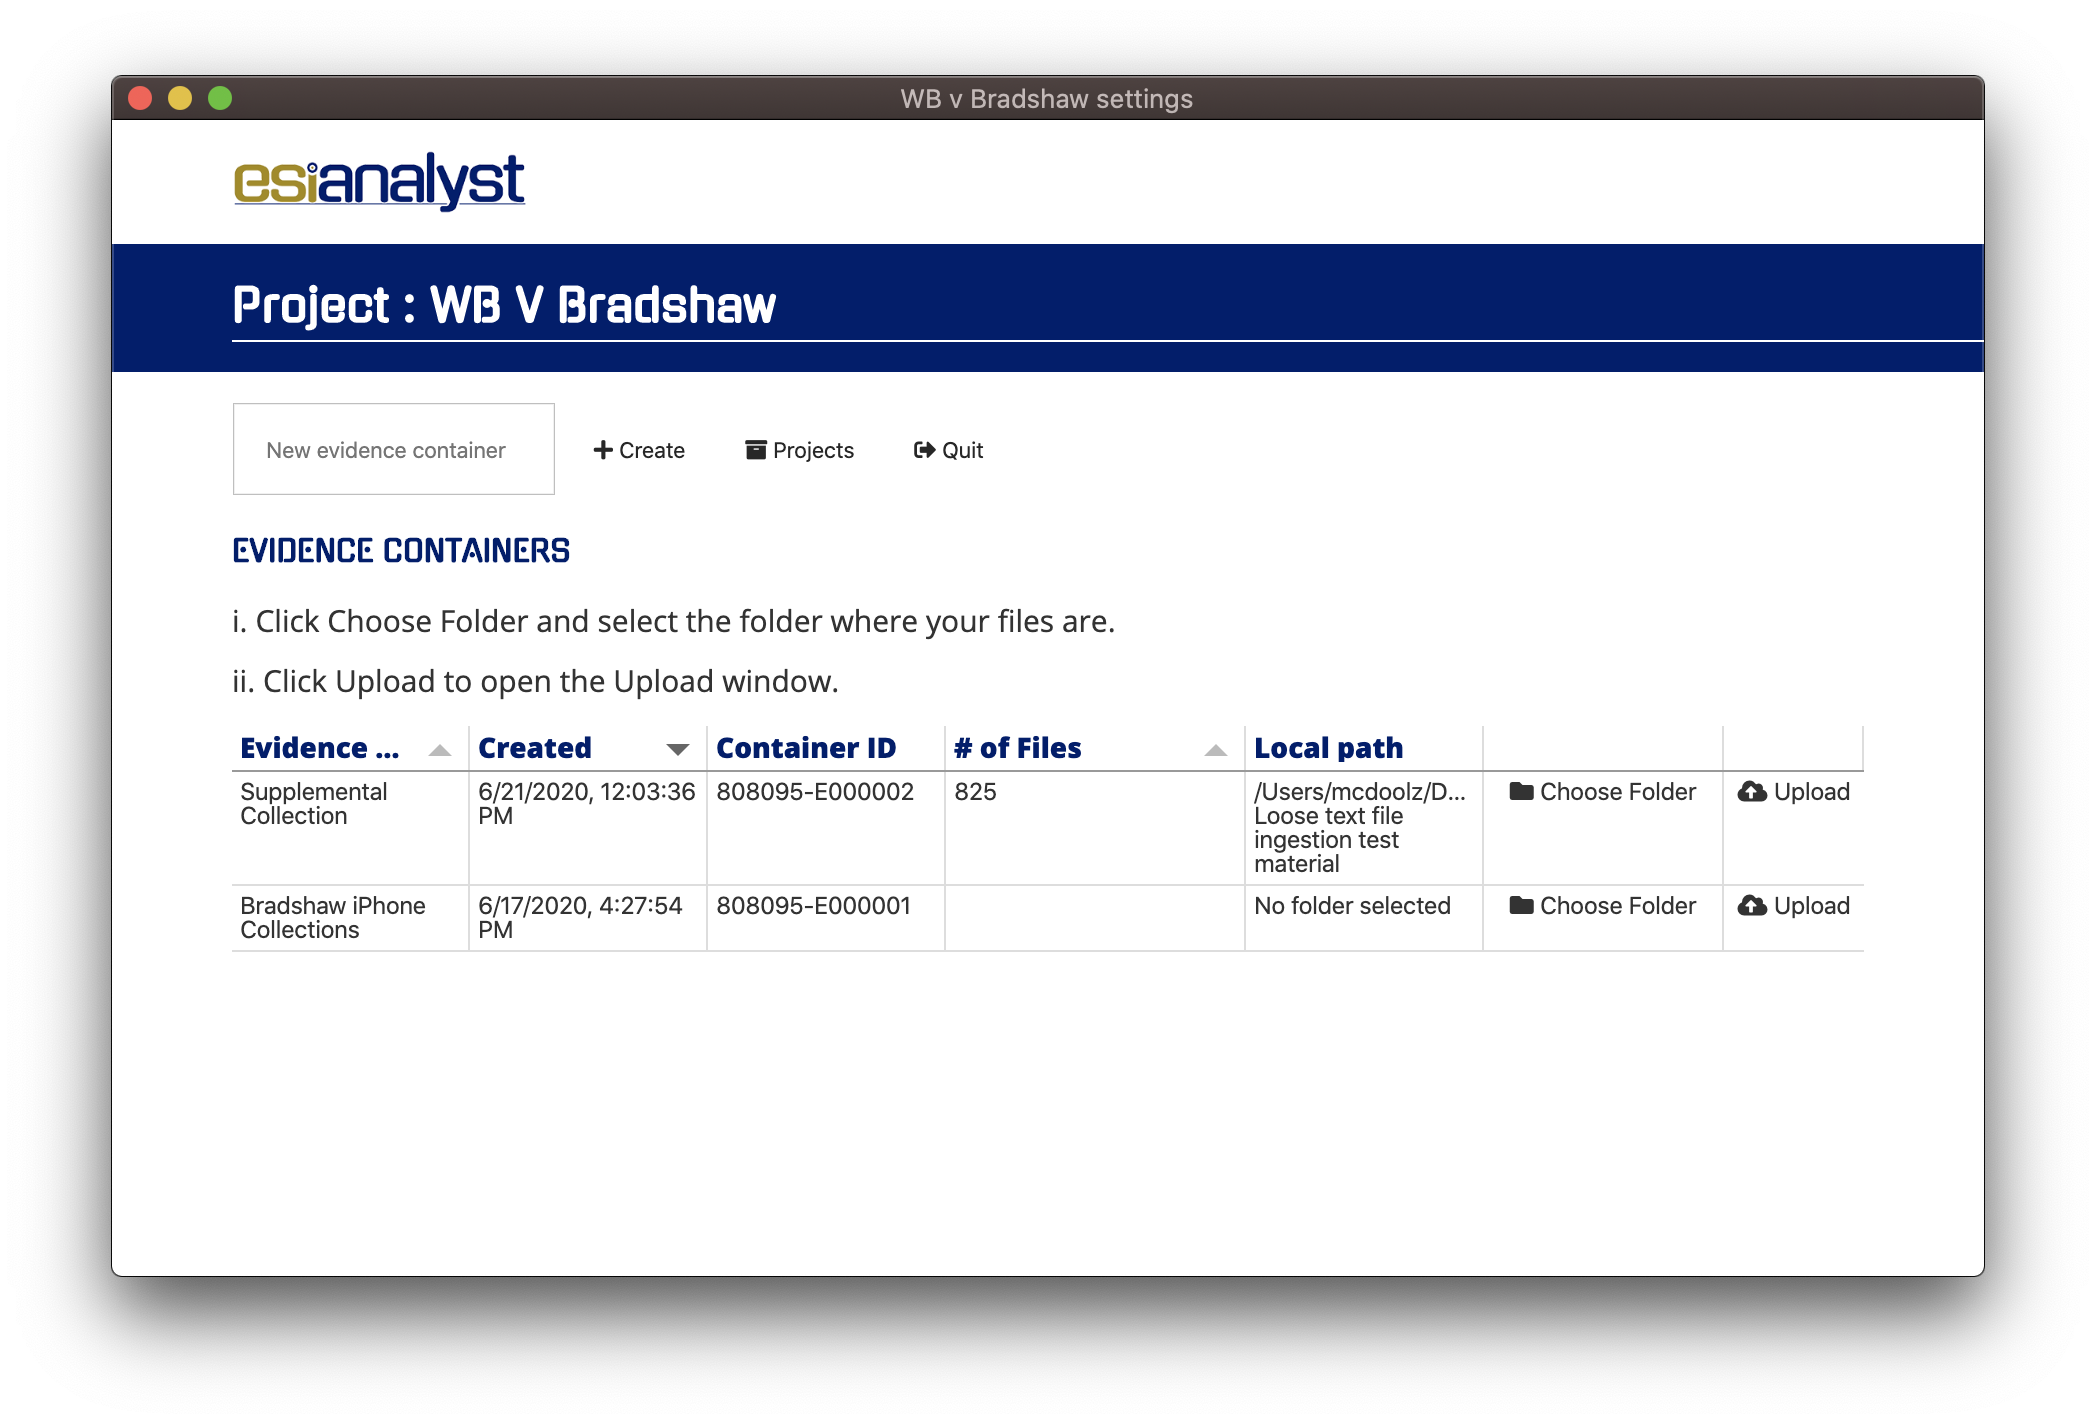
Each evidence container represents a container upon the platform and a remote folder to which you can upload your files.
You may Create an evidence container at any time through the interface.
To assign a folder to an evidence container, click the "Choose Folder" button on the right.
The following file selection dialogue will appear:
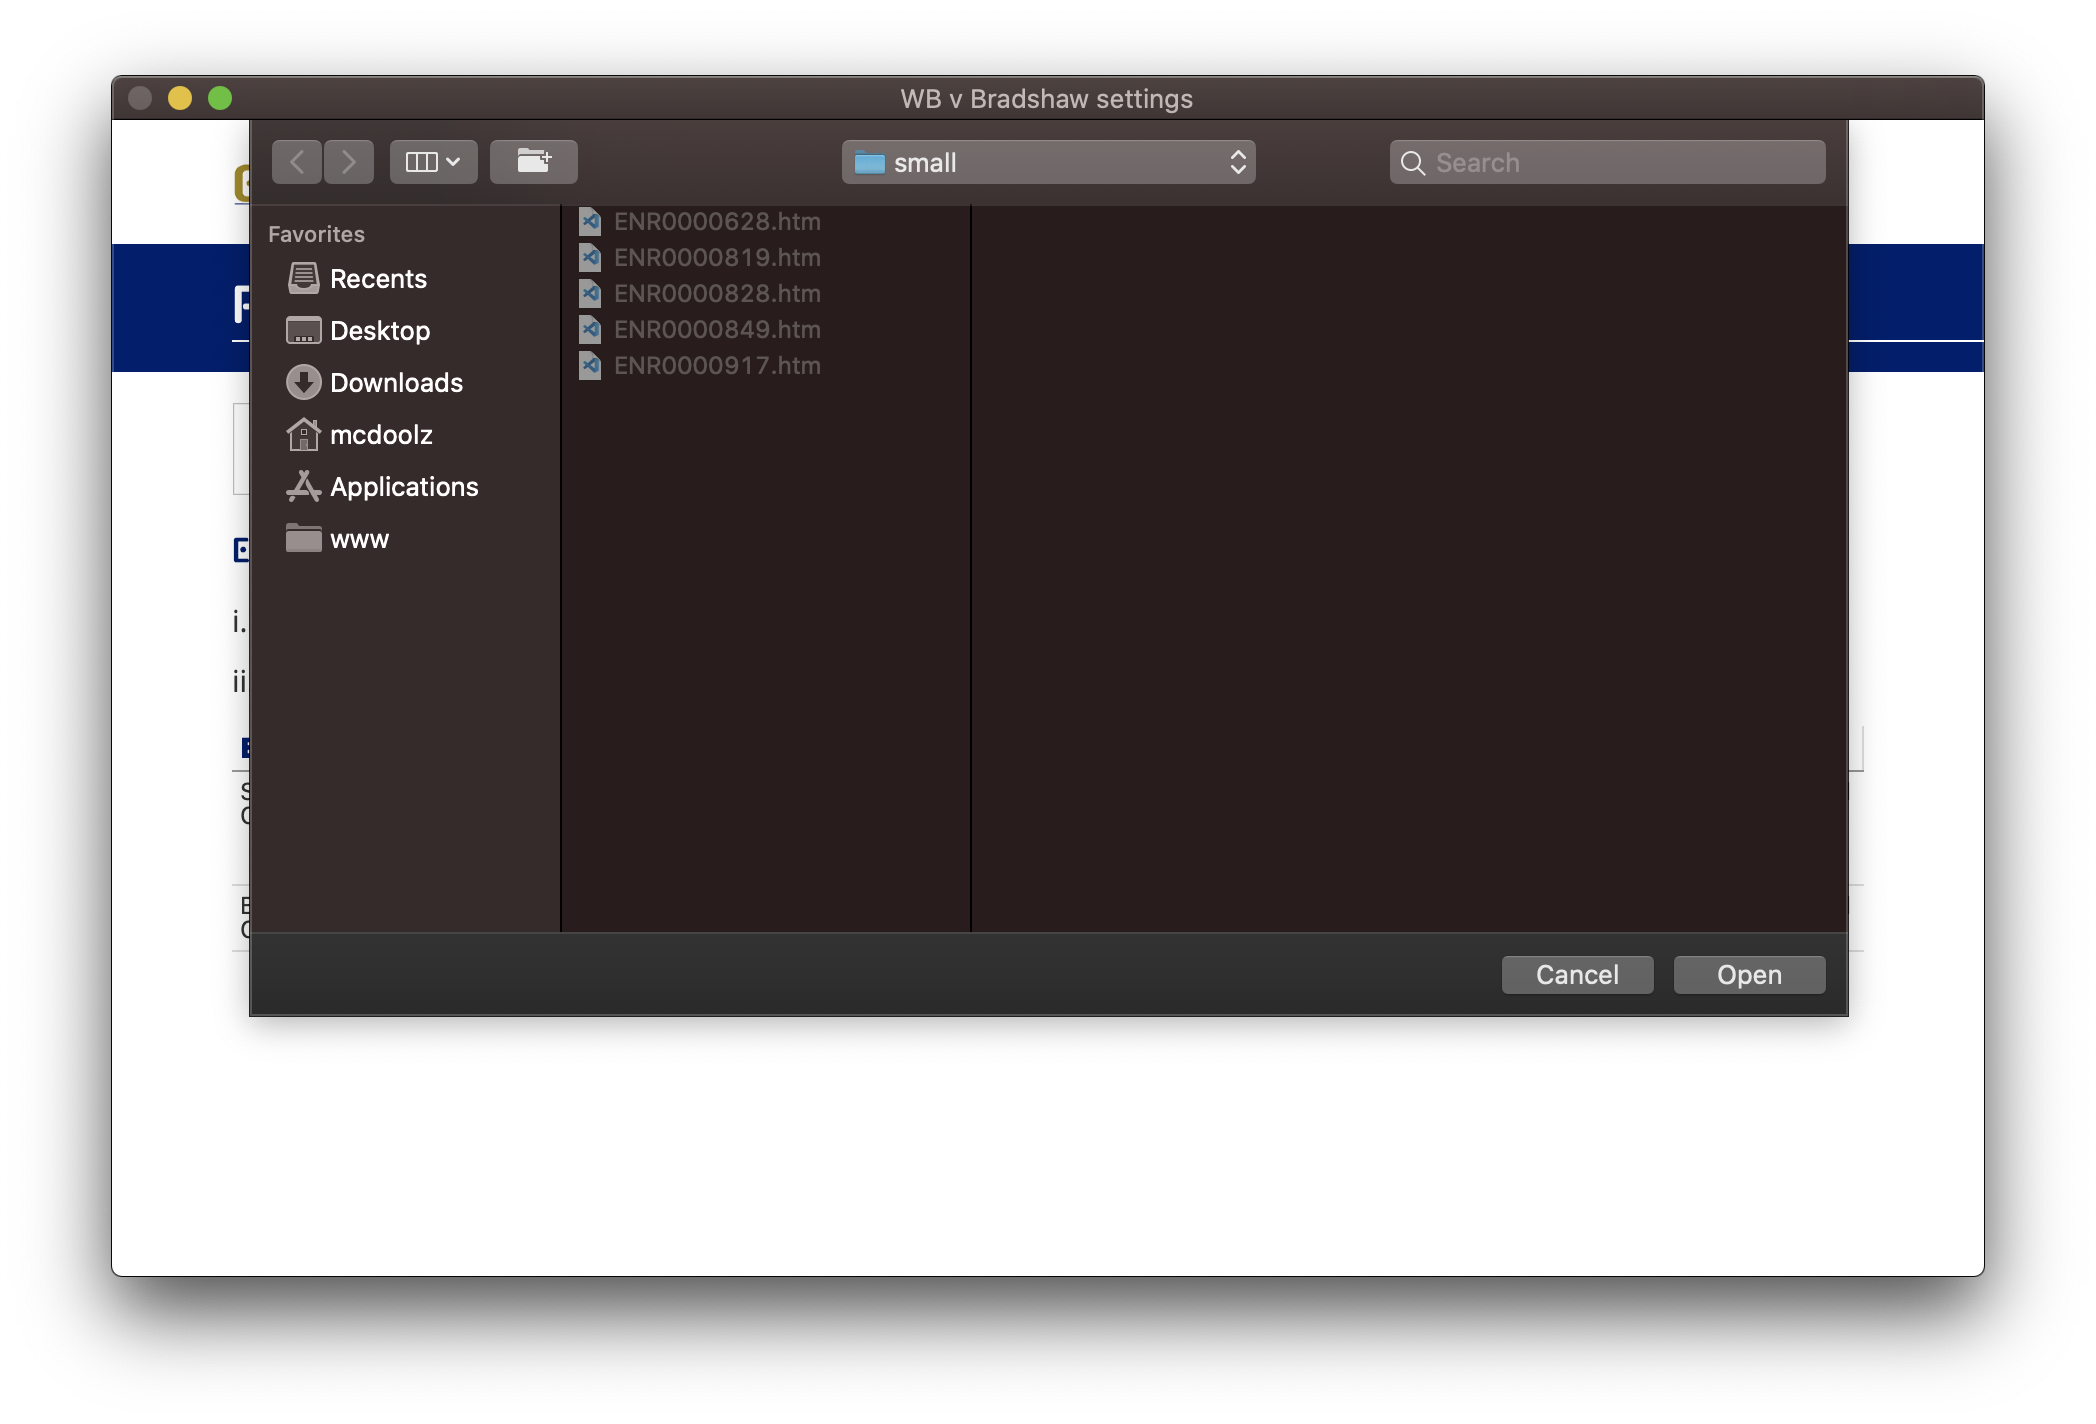
Navigate to the folder you wish to assign to the evidence container. Remember, don't select an individual file, just navigate to the folder in question and click Select.
Once this is done you should see the updated URL and file count appear in the evidence containers table row.