
CloudNine recommends using CloudNine Discovery Portal to import UFDR files into CloudNine Analyst.
CloudNine Discovery Portal Knowledge Base
CloudNine Discovery Portal to CloudNine Analyst UFDR Workflow
Download and install CloudNine Discovery Portal
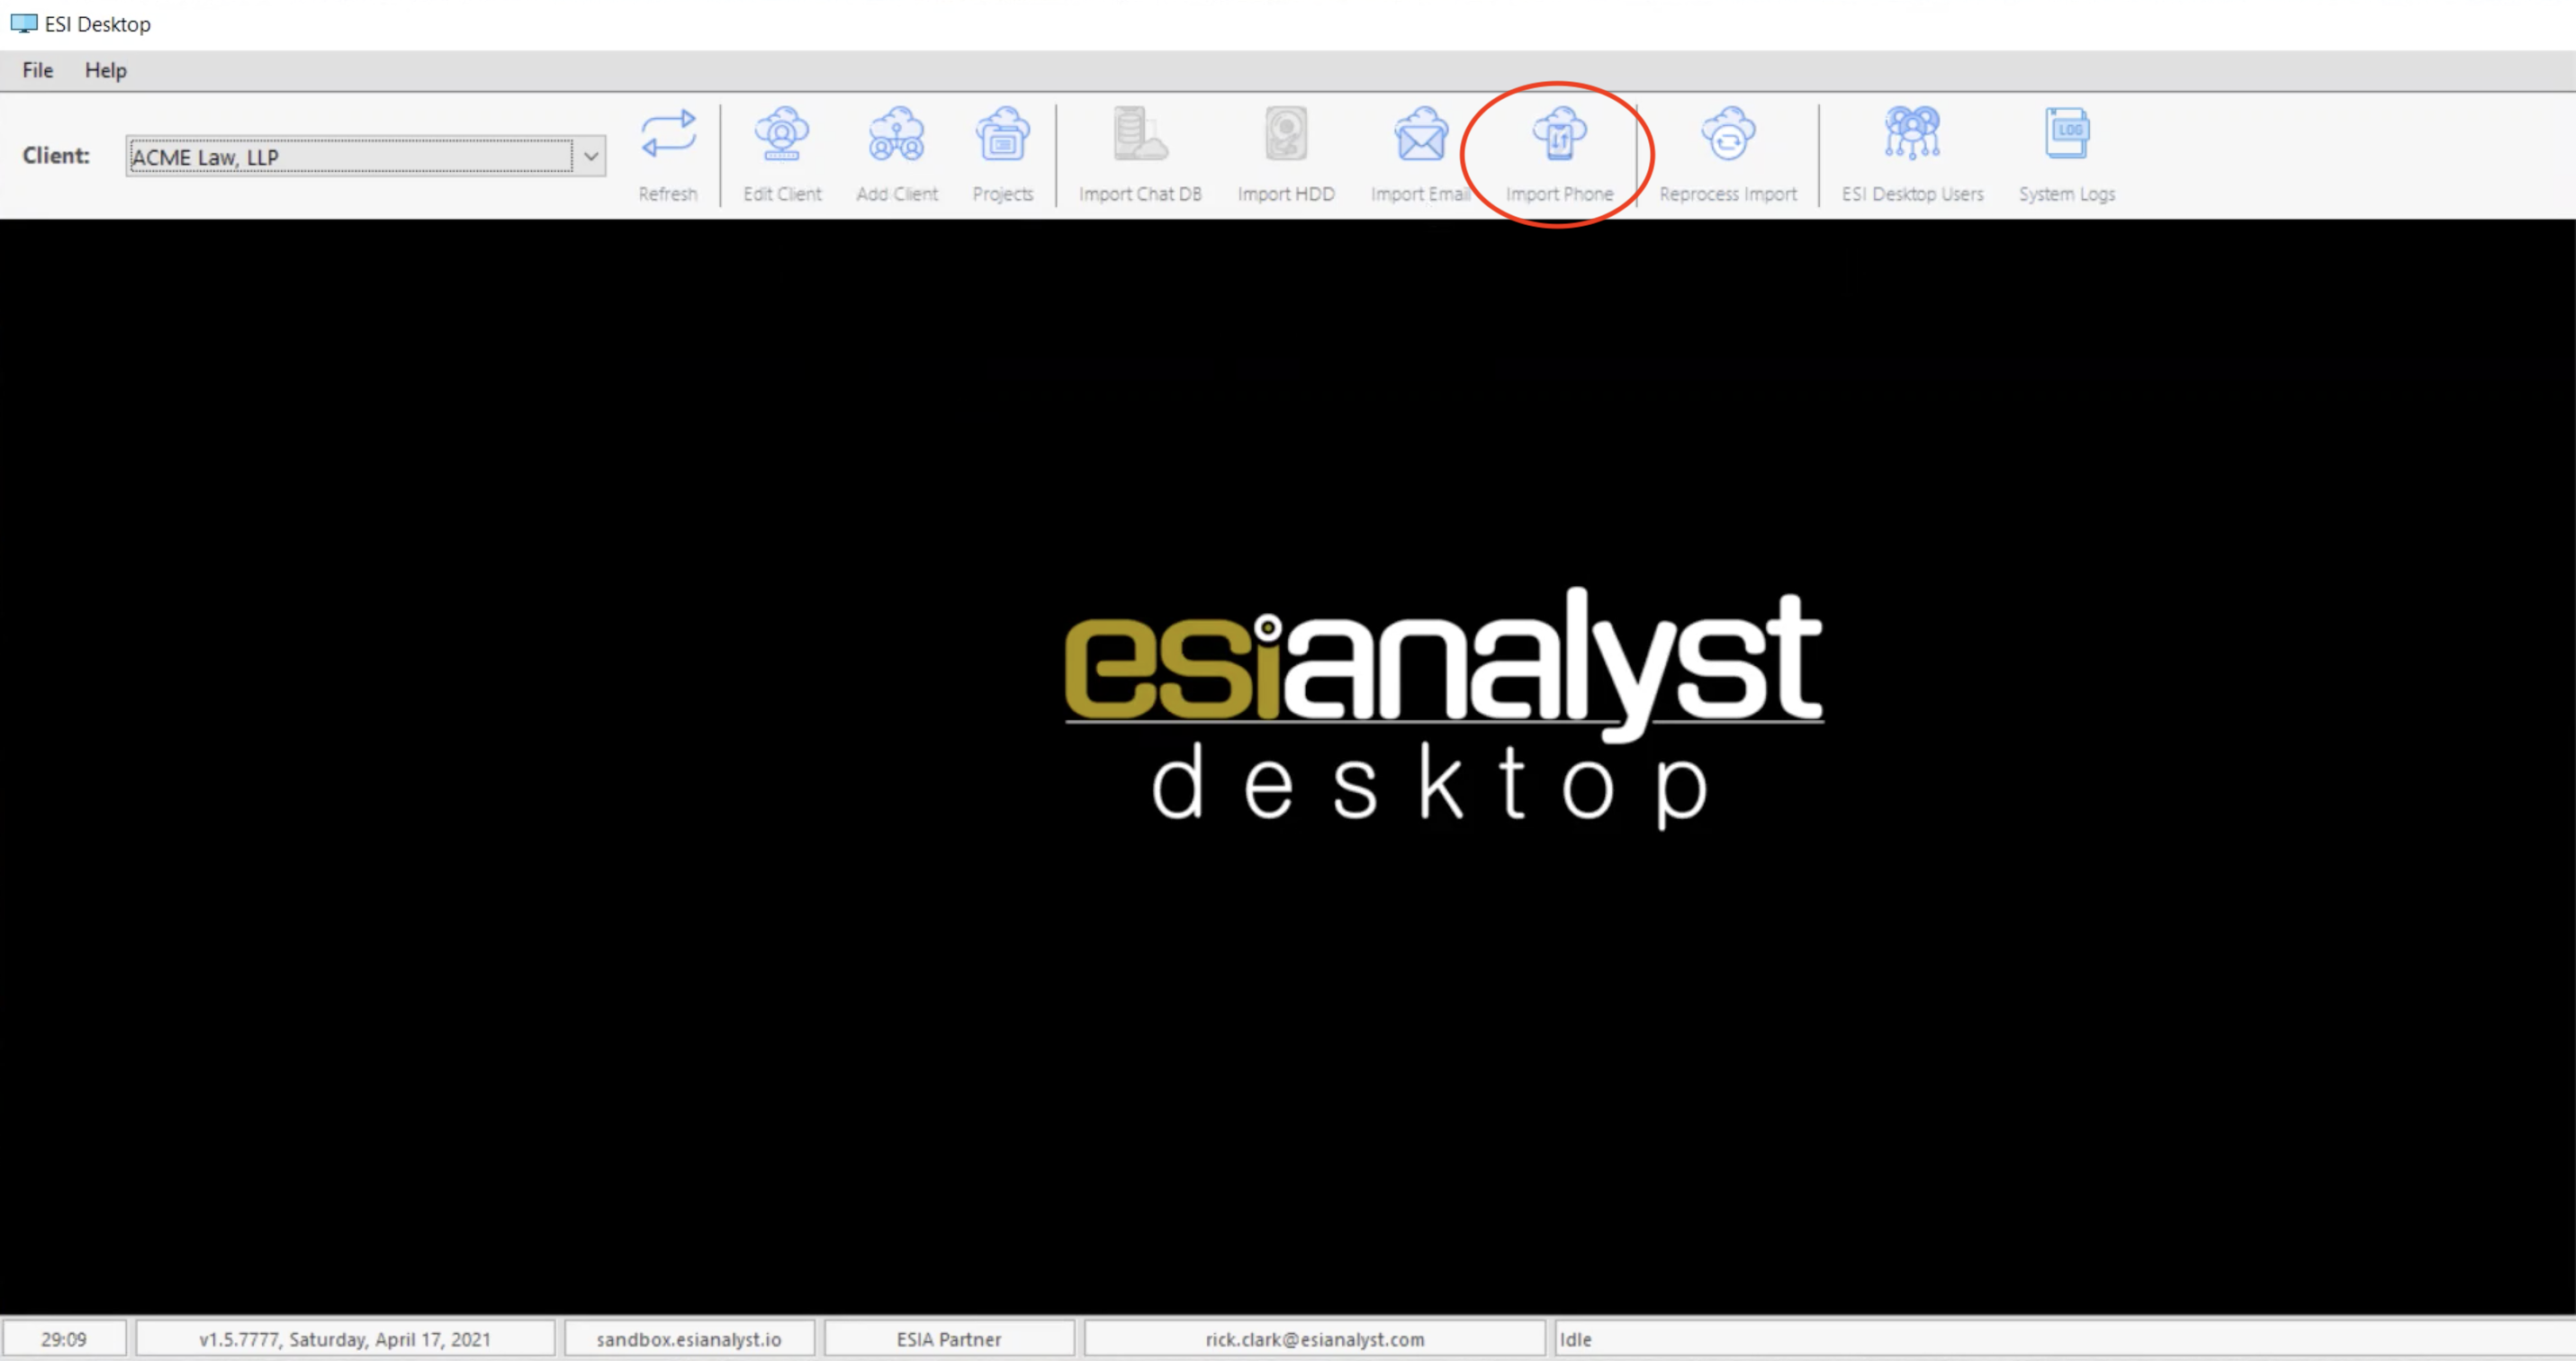
ESI Desktop uses a wizard-based approach for importing data into CloudNine Analyst. The format and process for importing data are similar across all modules and provide a direct conduit from the source data to CloudNine Analyst. To start the import process of a UFDR, click on "Import Phone" in the top menu.
Project and Evidence Container Selections
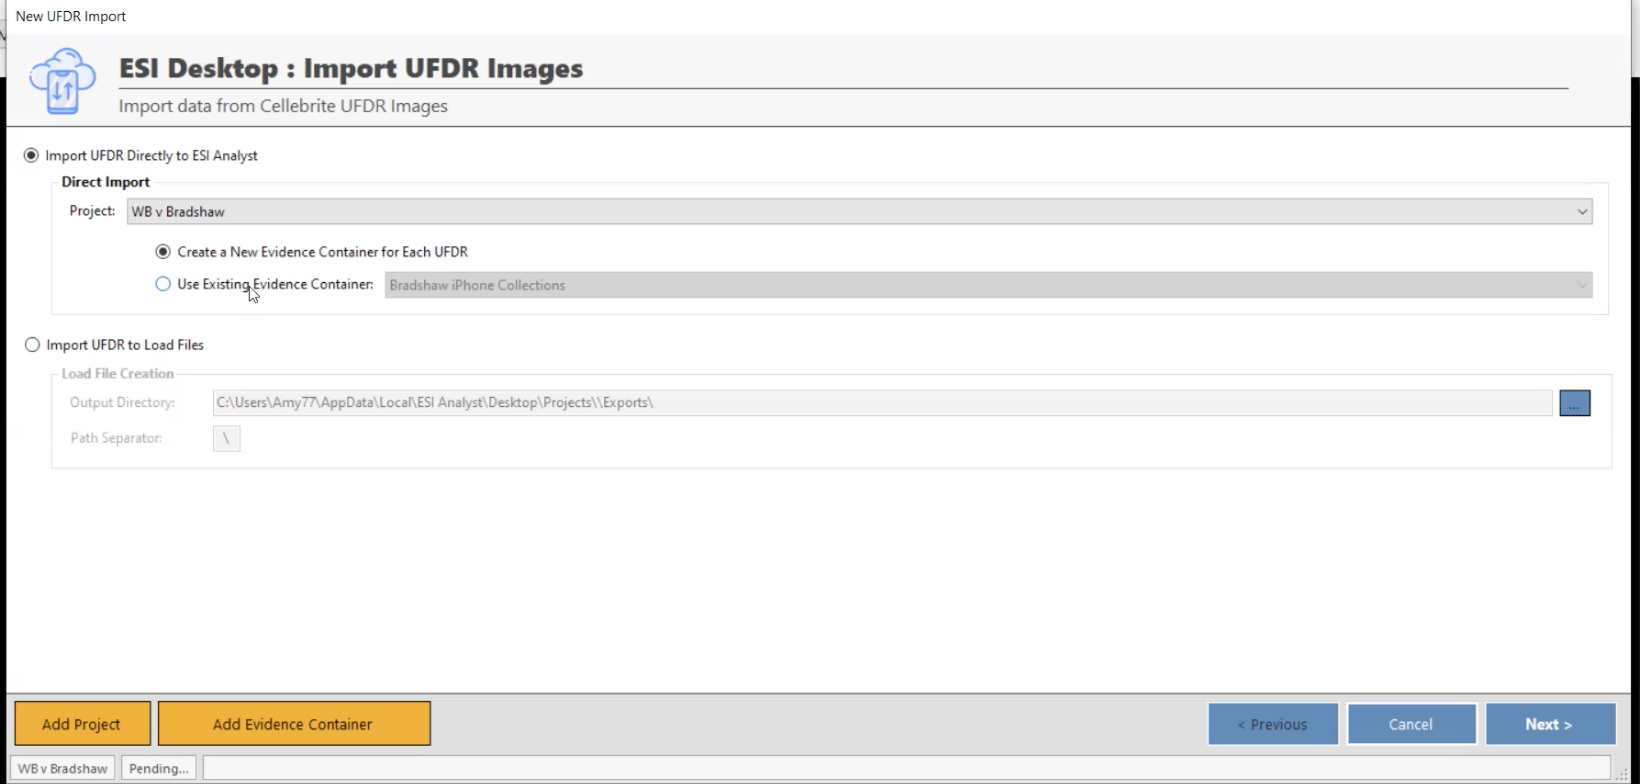
The first step of importing data is to select the project that the data will be loaded into. Data will be loaded for the currently selected Client in the ESI Desktop main window which is also displayed in the import wizard status bar at the bottom left. At this point you have the option to either select from an existing project or create a new project. All existing projects will appear in the drop-down list and to create a new project simply click on the “Add Project” button. Adding a project is the same process as from the Project Management window. Once added the new project will appear in the drop-down list of available projects.
Once you have selected a project, you can either choose an existing Evidence Container to load data into, create a new Evidence Container, or allow ESI Desktop to create evidence containers dynamically based on the data being loaded. Generally speaking, allowing ESI Desktop to dynamically create containers will be your best and easiest option, but the other options are available if needed. After selecting your project and evidence container, click "Next."
Assigning Your Control Number and Prefix

The second step of importing data is to define how ESI Desktop will assign control numbers and what data you want to import into CloudNine Analyst.
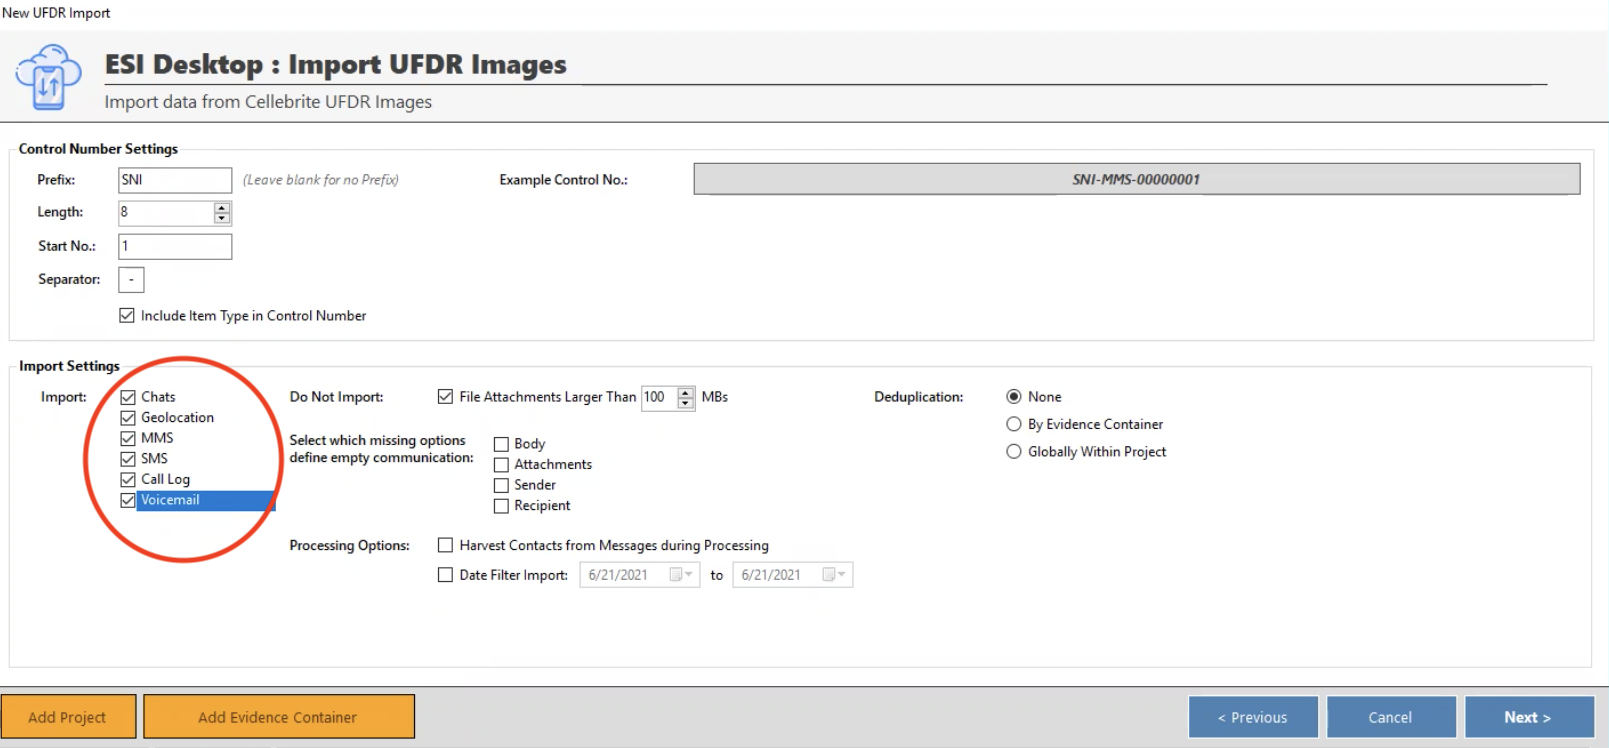
When defining control numbers you can provide a prefix to start each control number with, the length of the numeric portion of the number in digits, the number to start on, and if the type of data should be included in the control number, e.g. MMS, SMS, CHAT, etc… An example of a control number generated from your selections will be displayed on the right side of the wizard.
Import Settings
Each source will have unique data that can be imported into CloudNine Analyst. These data types will be listed under Import Settings as a checklist of options. For example, the ESI Desktop wizard for importing data from a Cellebrite UFDR file allows you to import MMS, SMS, Chat, iMessage, Geolocation, Contacts, and Call logs from a cellphone image into CloudNine Analyst. Select the data types you would like to import by clicking on them - only checked items will be imported into CloudNine Analyst.
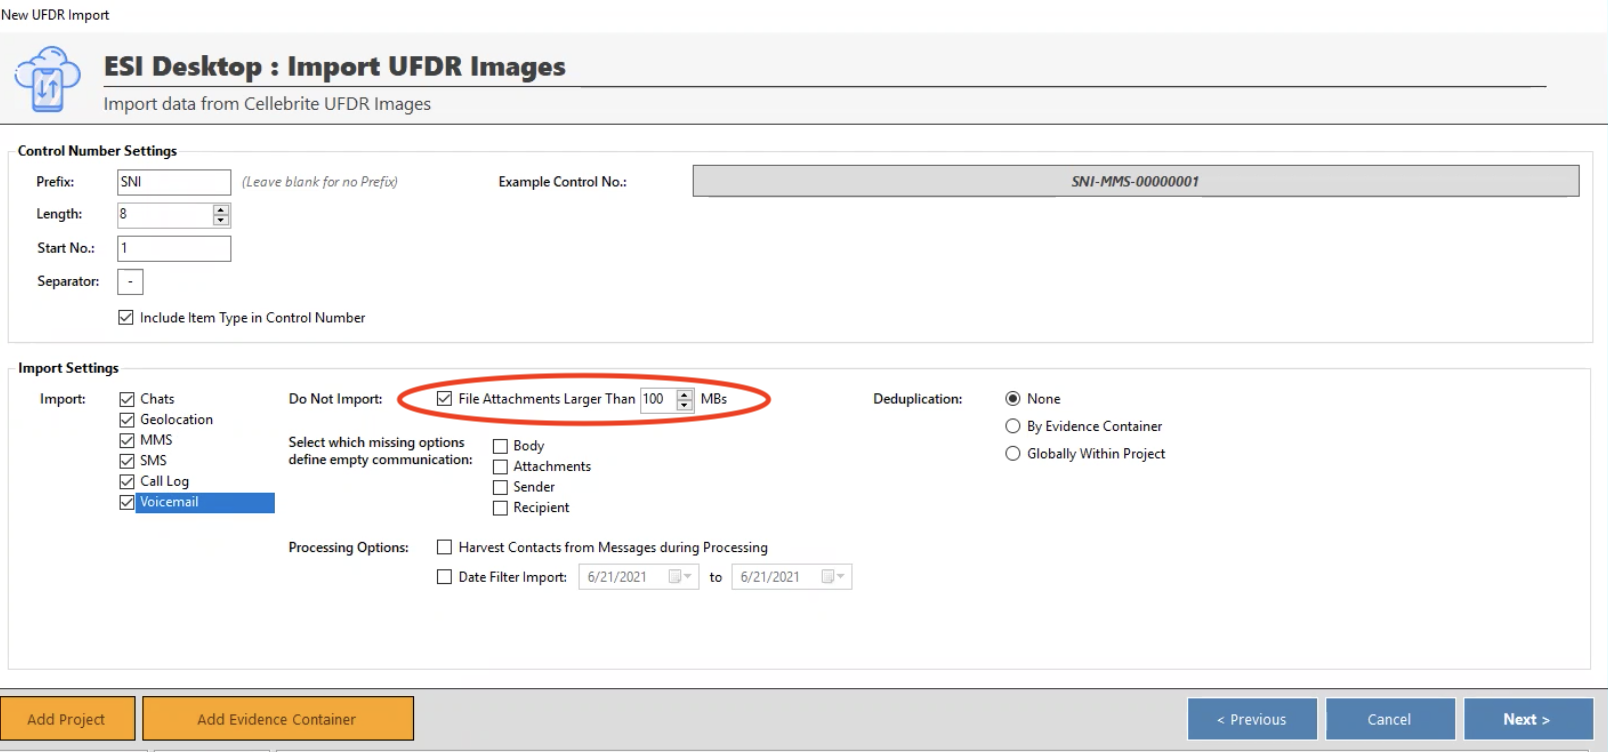
You can also choose to skip uploading attachments that exceed a certain size. Attachments larger than 100MB generally are poor choices for web-based review and you may want to review them in an alternate form. By default, this is 100MBs, but you can alter the size threshold or turn off this functionality altogether if desired. Any attachment that is filtered will have a placeholder loaded for it with the original attachment name and size and a note stating that it was not loaded to CloudNine Analyst due to user-selected size filters.
You can also filter by the date upon import and will filter that data using the UTC timestamp so adjust your date accordingly.
Finally, select the scope for deduplication. Global means that items loaded will be deduplicated against all other items within the project, Evidence container means that items loaded will only be deduplicated against the current evidence container, and none means there will be no deduplication. Note, Evidence Container dedupe combined with dynamically generated Evidence Containers will effectively be device-level deduplication as each device will get its own Evidence Container.
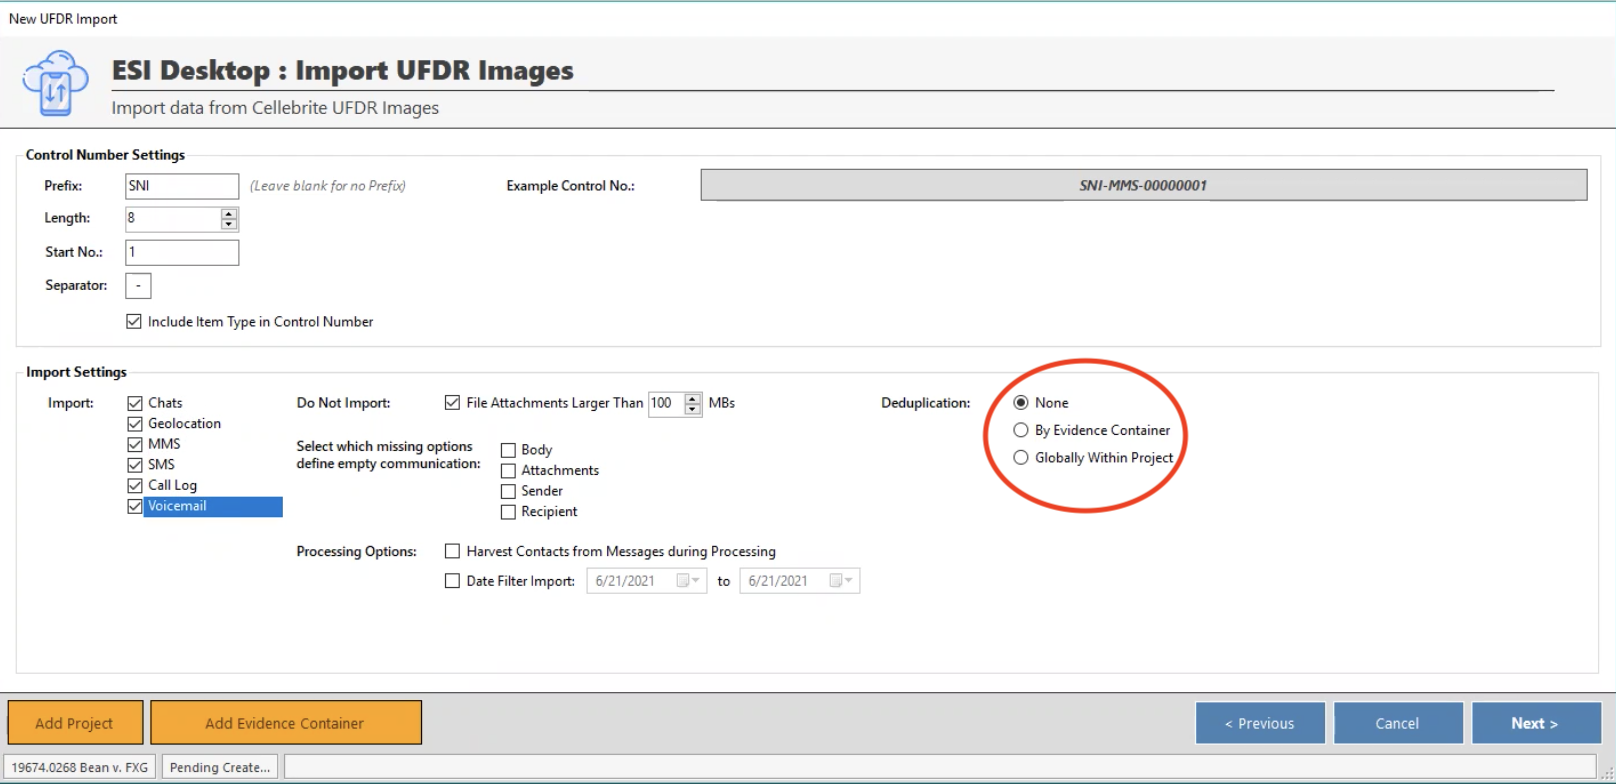
When you have finished configuring control numbers and selected the import options, click “Next >”.
Source Directory
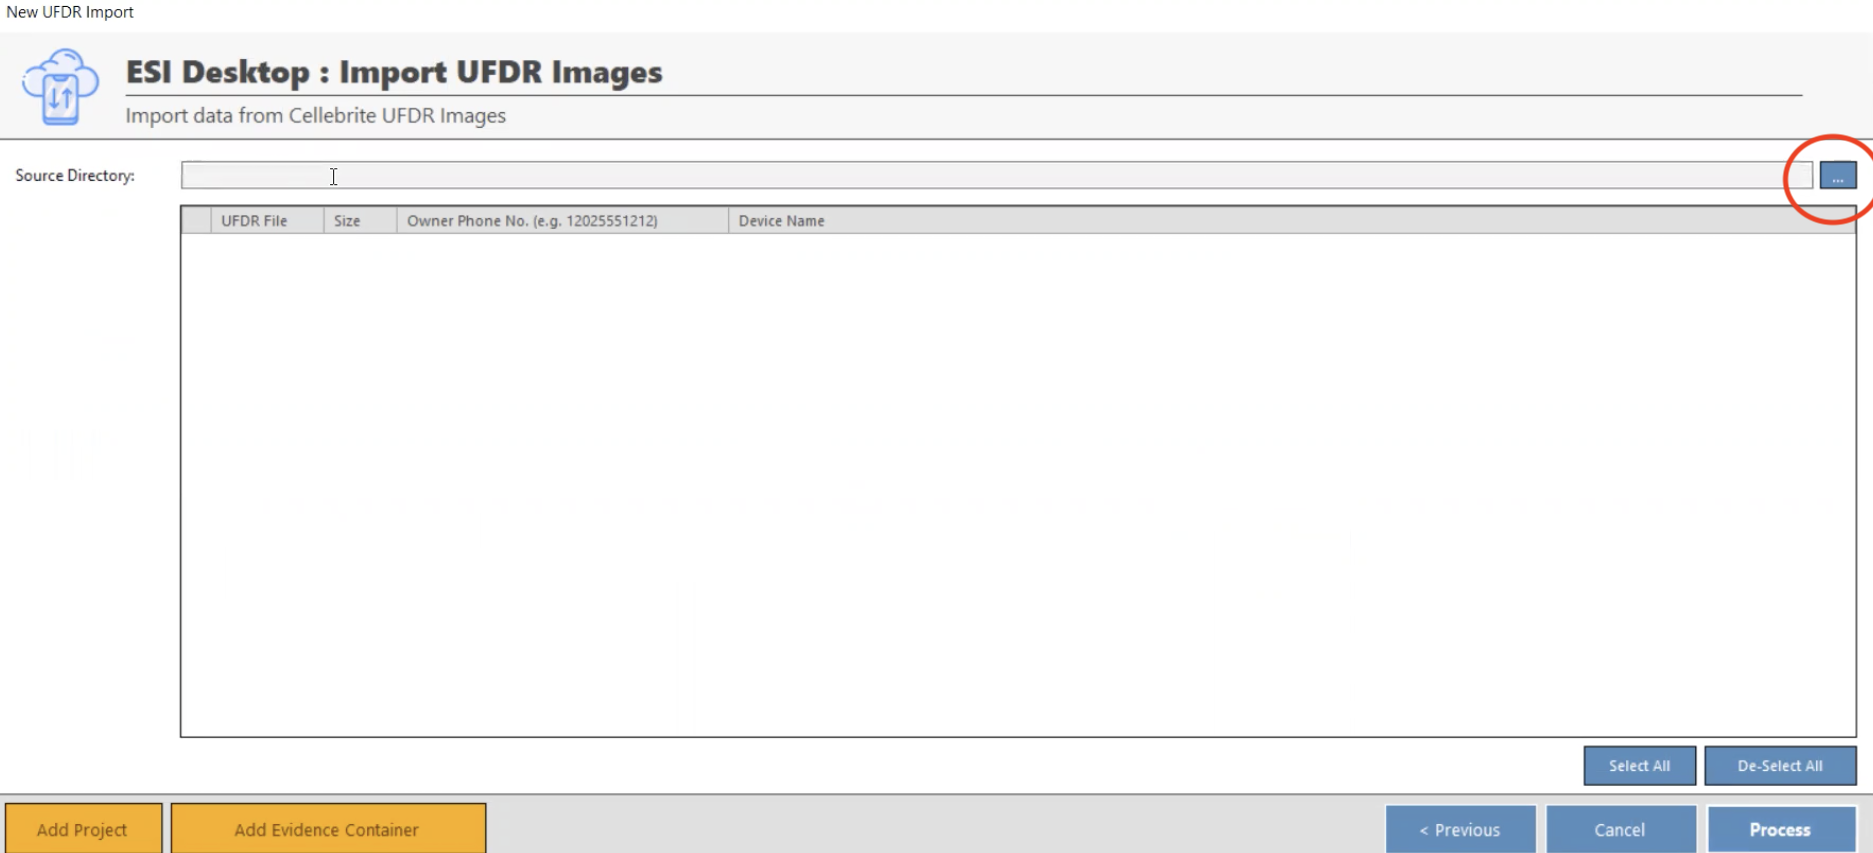
The final step in preparing to import data using ESI Desktop is to select the source files for ingestion. All UFDR files in the selected Source Directory will appear for you to choose from. Only checked items will be processed and uploaded to CloudNine Analyst. To path out to your UFDR file, click on the blue button at the top left-hand corner.
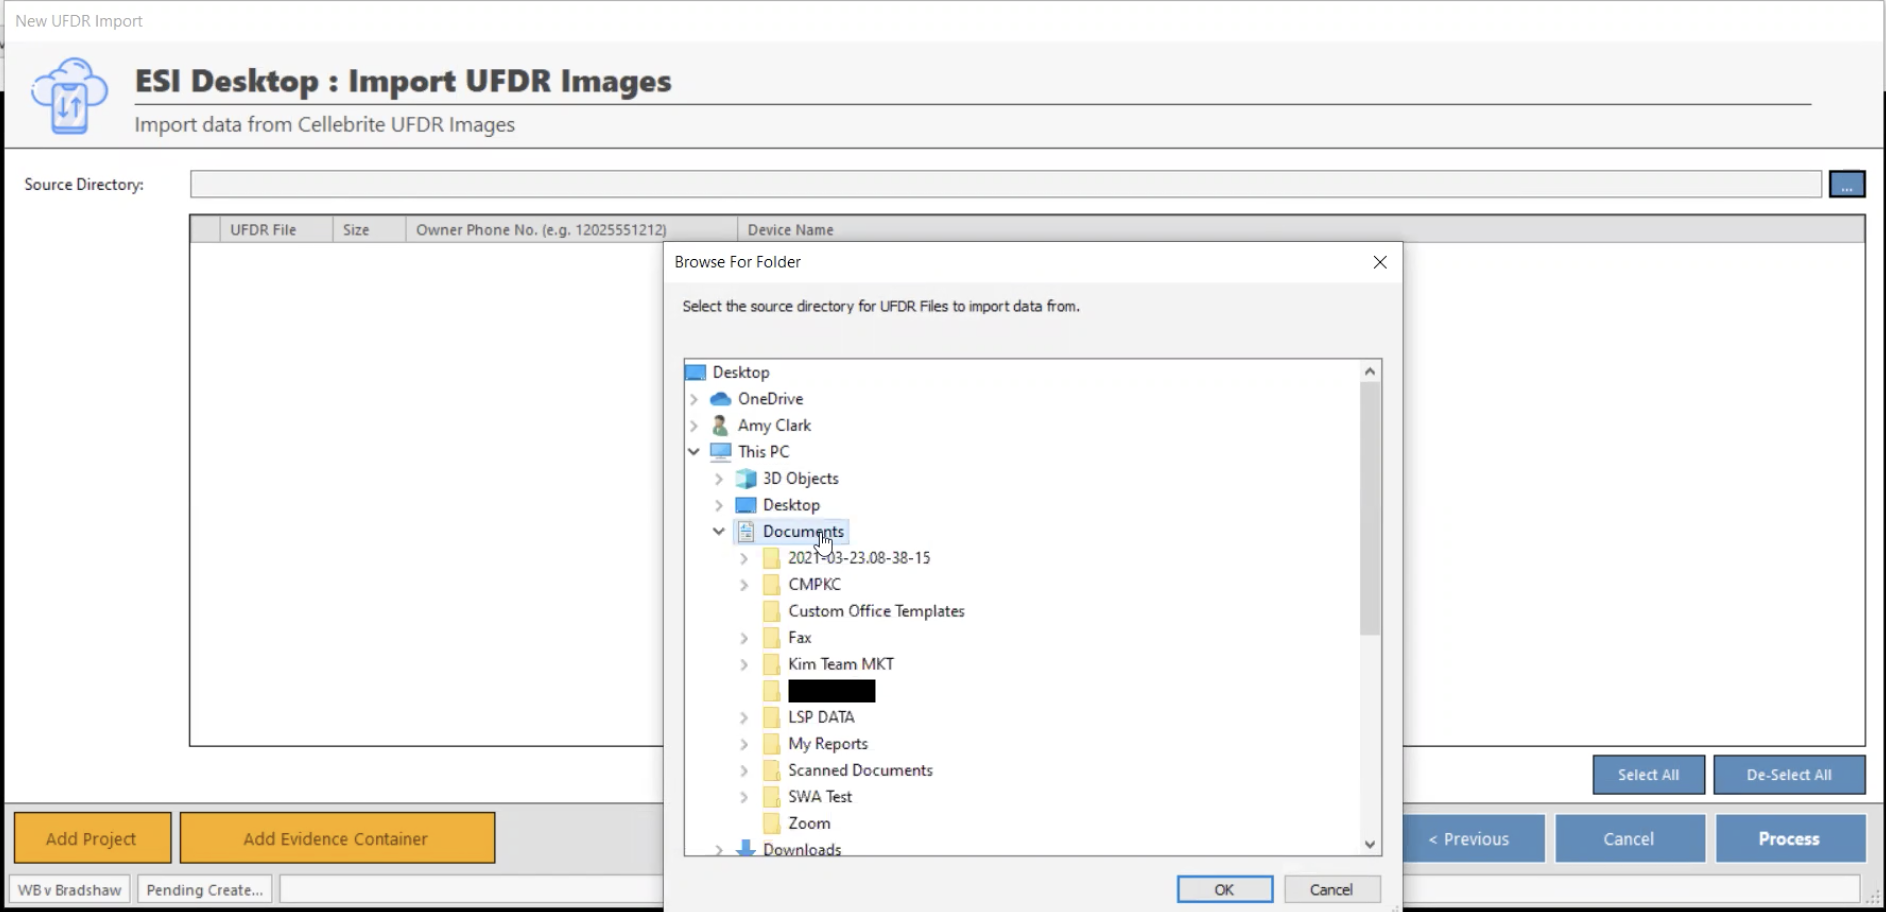
Then click "Documents" and select the top-level folder for your file.
Owner ID and Device Name
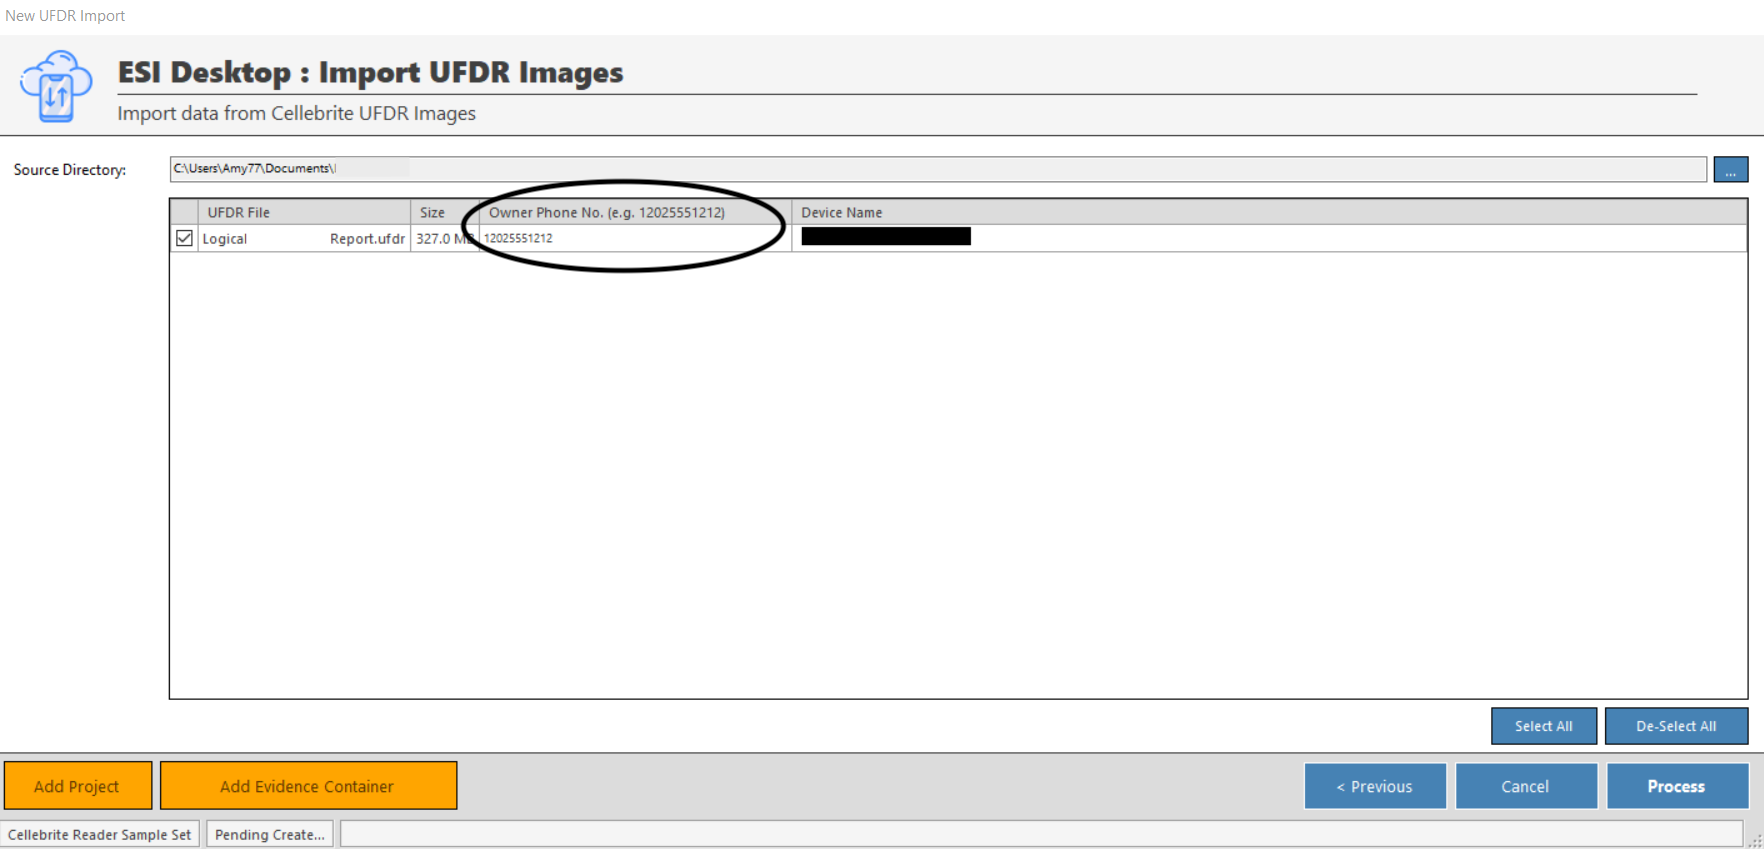
When importing from UFDRs two data points are required for each import, the Owner ID and a Device Name. The Owner ID is the phone number associated with the device and is used to assist in deduplication and conversation threading. The Device Name defaults to the UFDR filename and is used by ESI Desktop as a friendly name for the UFDR Import. It is associated with the upload and used for creating the Evidence Container if dynamic Evidence Containers was selected.
Note: It is VERY important that you include the device phone number WITH the leading country code. Example - 13212311253
When you have selected the UFDR files you wish to import and provided Owner Phone Number and Device Names for each, click “Process” to begin processing the files and uploading to CloudNine Analyst.
You can follow the progress of the upload and once completed in ESI Desktop, there will still be some time for CloudNine Analyst to finalize the upload, so be sure to compare counts from your logs with what is in CloudNine Analyst.
You can begin reviewing data while data is still uploading from the desktop.