
You have the Registered Application in Microsoft Entra ID to enable third-party connections to Microsoft 365 and/or Purview, and you have the required Credentials: Application (client) ID, Directory (tenant) ID, and Client Secret. The next step is to add the Connector to CloudNine Review.
Note: Only CloudNine Review Global Administrator users have rights to establish Connectors. If the option is unavailable, contact your administrator.
- Log in to CloudNine Review.
- On the My Projects page, select the User Menu in the top-right corner and choose Connectors.

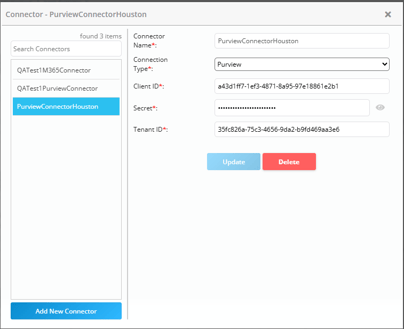
- The Connector-Create New window opens. Complete the following:
- Connector Name: Type a unique identifying name (e.g.,
365ConnectororPurviewConnector). - Connection Type: Select either Purview or O/M 365 from the drop-down list.
- Client ID: Paste the Application (client) ID copied from Microsoft Entra ID.
- Secret: Paste the Client Secret Value generated in Microsoft Entra ID.
- Tenant ID: Paste the Directory (tenant) ID copied from Microsoft Entra ID.
- Connector Name: Type a unique identifying name (e.g.,
- Click Create New. The Connector is created and appears under the Connectors list in the left column. To edit or delete the Connector, highlight the Connector Name, make any necessary changes, and then click Update or Delete.
🗒️You can add multiple Connectors to CloudNine Review. This feature enables your IT administrator to register applications in Microsoft Entra ID, which helps manage user access to specific data more effectively. For example, you may need connectors for Purview and Microsoft 365, or you might want to establish connectors by geographic location.
The Connector has been established in CloudNine Review. You will use the CloudNine Discovery Portal to transfer data from the Cloud Connector to CloudNine Review.