
Click here to watch a video overview
Before a document can be tagged for a field, the tag field must first be created. You can create a field by accessing the “Modify Fields” in the Tools menu located at the top right-hand portion of your screen. Then, click the New Field icon to add a new field.

Figure 37
The New Field Option will open up a menu, where you can:
- Assign a Name to the Field
- Change the Field Scope to Global or Local
- Change the Field type
- Make the Field Quick-searchable
The Field Scope field determines who can and who cannot view your tag fields. Just like saved searches, global fields can be seen by everyone while Local fields can be seen only by you. You must have Create Global Fields rights set up by your administrator to be able to create global fields.
There are a variety of field types available for use in CloudNine, but the most commonly used is the yes/no field. This is selected by default and is used in all our examples throughout this Section.
Quick-Searchable fields will have the ability to launch a quick search directly from the document pane, by selecting the Magnifying glass next to the tag field. To see the magnifying glass, hover over the tag in question and click the magnifying glass to run the search: (See Figure 38 on Next Page)
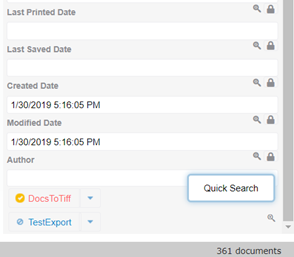
Figure 38
When the search is completed, a popup Quick Search window will appear in the center of the screen. You can navigate, tag and view documents related to that quick search inside this window without losing your place in the original search. (See Figure 39)
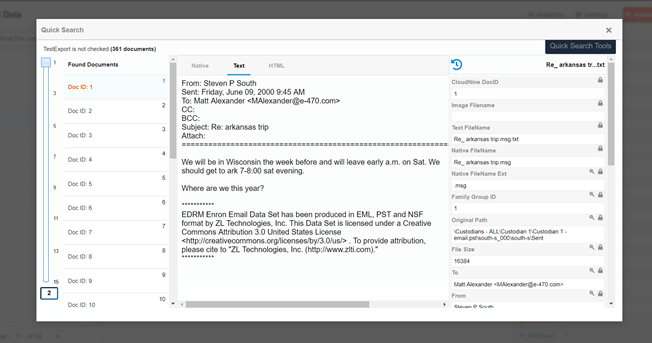
Figure 39